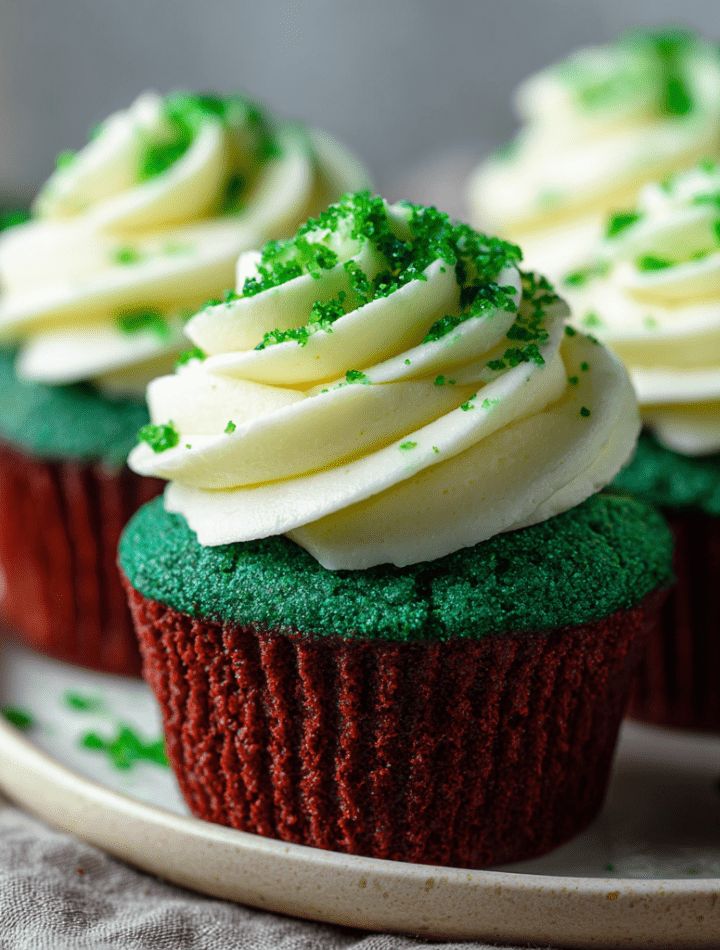
Green Velvet Cupcakes: Your New Secret Weapon for Celebrations
Hey there, friend! Grab your favorite mug of coffee and pull up a stool. Have you ever found yourself scrolling through dessert ideas for St. Patrick’s Day or a spring party, wishing for something more exciting than another batch of sugar cookies? I’ve been there too. That’s exactly why I want to share this little pot of gold with you today: my absolutely irresistible Green Velvet Cupcakes.
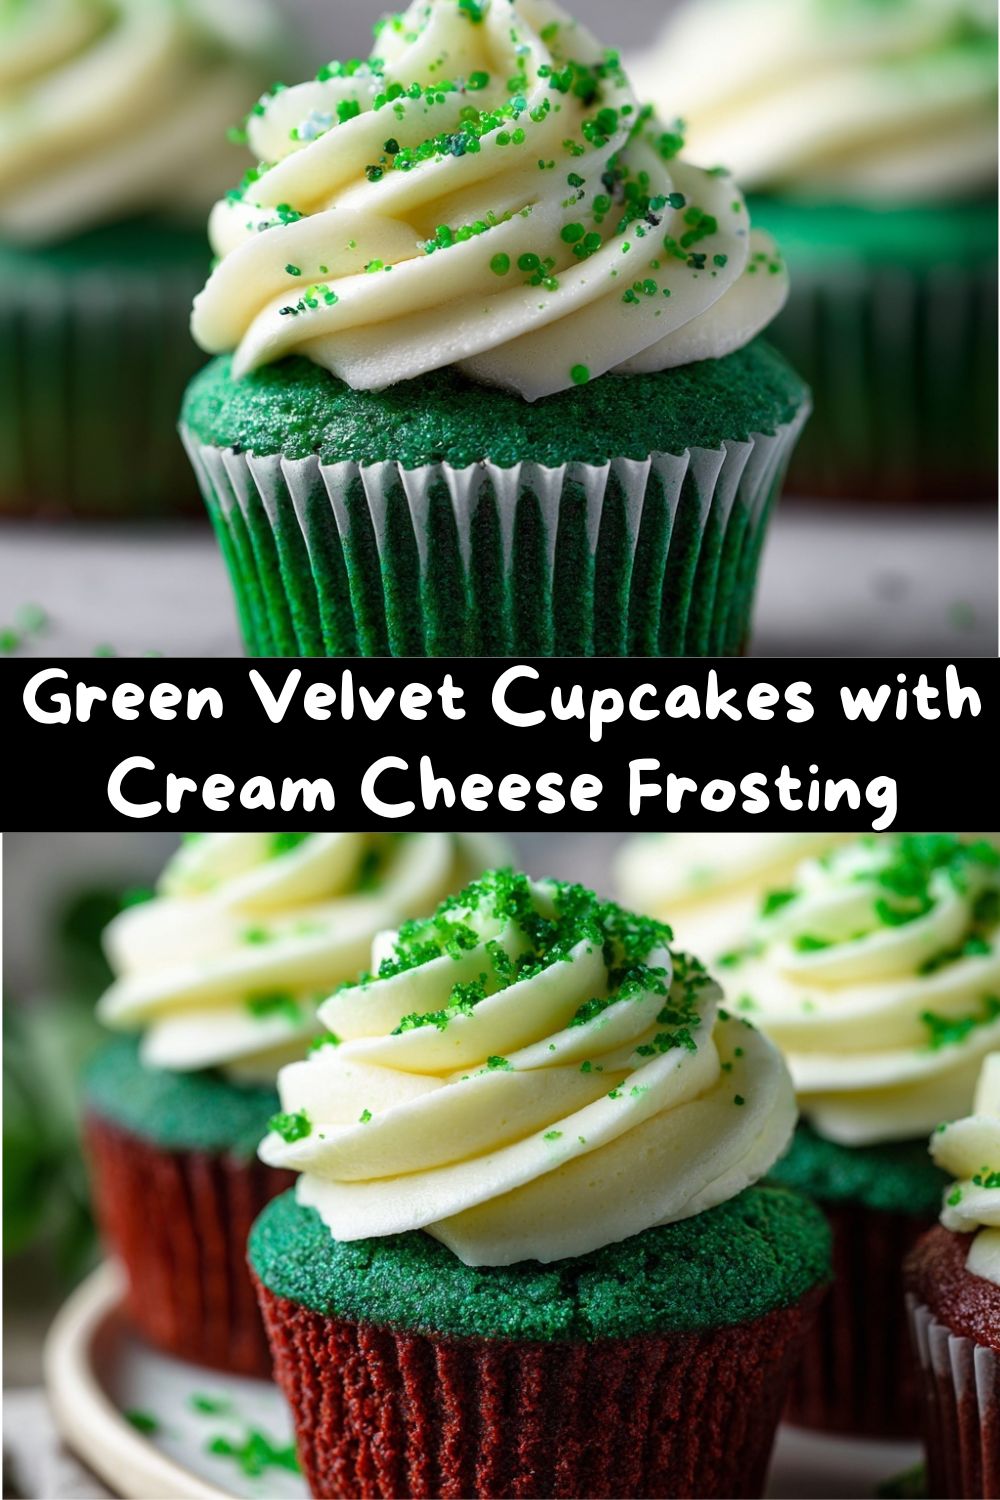
We all know and adore classic red velvet, right? That tender, buttery crumb with its whisper of cocoa and tangy cream cheese frosting is a masterpiece. But what if we took that beloved formula and gave it a fresh, festive, and totally fun makeover? Enter these fluffy, vibrant green wonders. They have all the soul-satisfying texture of the original, but with a color that’s pure joy. It’s like a little celebration in cupcake form, and I promise, they’re just as delicious as they are photogenic.
Whether you’re hosting a party, bringing a treat to a potluck, or just want to bake something that’ll make your family’s eyes light up, these cupcakes are your answer. They’re surprisingly simple to make, and the “wow” factor is off the charts. So, tie on that apron (the messy one is always the best), and let’s turn your kitchen into a bakery of happiness. We’re about to make some magic!
From Kitchen Flop to Leprechaun Luck: My Green Velvet Journey
Let me take you back a few St. Patrick’s Days ago. I was determined to create a show-stopping green dessert that wasn’t just mint-flavored. My first attempt? A green cake using only liquid food coloring. Friends, it came out of the oven looking… sad. A murky, olive-drab color that reminded me more of camouflage than a celebration. It tasted fine, but it looked like it had given up on life. I was so disappointed!
But then I remembered a lesson from my grandma, who never let a baking flop go to waste. “Flavor first, honey,” she’d say, “but presentation is the welcome hug.” I went back to the drawing board, learned about the power of gel food coloring, and fine-tuned the balance of cocoa to keep that signature velvet taste without battling the green hue. The next batch was a revelation! A brilliant, cheerful green that stayed vibrant after baking. When I brought them to a neighborhood party, they disappeared in minutes, and the recipe requests came flooding in. That little failure taught me that sometimes, the best recipes are born from a bit of kitchen stubbornness and a whole lot of love. Now, it’s a tradition I look forward to every spring!
Gathering Your Rainbow of Ingredients
Here’s everything you’ll need to create these fluffy green clouds. I’ve added my little chef notes next to each one because knowing your ingredients is the first step to baking with confidence!
For the Green Velvet Cupcakes:
- 1 ¼ cups all-purpose flour: The trusty foundation. For a slightly lighter crumb, you can swap in cake flour, but all-purpose works beautifully here.
- 1 tbsp cocoa powder: This is the secret! It’s not for a chocolate flavor, but to deepen the color and add that subtle, complex background note that makes velvet cakes so special. Use natural, unsweetened cocoa.
- ½ tsp baking soda: Our leavening agent. Make sure it’s fresh for the best rise.
- ½ tsp salt: Never skip this! Salt makes all the other flavors pop and balances the sweetness perfectly.
- ½ cup buttermilk: The tangy superstar. It tenderizes the crumb and reacts with the baking soda for lift. Chef’s Hack: No buttermilk? Mix ½ cup regular milk with ½ tbsp lemon juice or white vinegar. Let it sit for 5 minutes until slightly curdled.
- 1 tsp white vinegar: Amplifies the buttermilk’s acidity, ensuring our cupcakes are extra tender and fluffy.
- 1 tsp vanilla extract: Pure vanilla, if you have it, adds a warm, lovely aroma.
- ½ cup (1 stick) unsalted butter, softened: Room temperature is key! It should leave a slight indent when poked. This creams with the sugar to create air pockets for lift.
- ¾ cup granulated sugar: Sweetens and, when creamed with butter, helps create that soft texture.
- 1 large egg, room temperature: Another room-temp friend. It binds everything together and adds richness.
- Green gel food coloring: This is non-negotiable for vibrant color! Liquid coloring will water down your batter and bake up pale. Gel or paste coloring is highly concentrated. Start with a small squeeze and add until you get a deep, emerald green batter.
For the Cream Cheese Frosting:
- 8 oz (one brick) full-fat cream cheese, softened: Use the brick-style, not the spreadable kind in a tub. Full-fat gives you the best structure and flavor.
- ¼ cup (½ stick) unsalted butter, softened: Combined with the cream cheese, it creates a frosting that’s pipeable, stable, and dreamily creamy.
- 2 cups powdered sugar, sifted: Sifting is a tiny extra step that prevents lumps in your perfectly smooth frosting. Trust me on this one!
- 1 tsp vanilla extract: The perfect finishing note for our tangy, sweet frosting.
Let’s Bake! Your Step-by-Step Guide to Perfect Cupcakes
Ready? Let’s do this together. I’ll walk you through each step with all my favorite tips to ensure cupcake success.
- Preheat and Prep: First things first, get that oven preheating to a nice, steady 350°F (175°C). This ensures it’s perfectly hot when your batter is ready. Line a 12-cup muffin tin with your favorite paper liners. This is a great time to use those festive ones!
- Whisk the Dry Team: In a medium bowl, take your whisk and lovingly combine the flour, cocoa powder, baking soda, and salt. Whisking does two things: it blends everything evenly and aerates the flour a bit, which is a good thing! Set this bowl aside.
- Mix the Wet Team (and the Green!): In a smaller bowl or large measuring cup, combine the buttermilk, white vinegar, vanilla extract, and your green gel food coloring. Don’t be shy with the color—the batter should be a deep, forest green. It will lighten a touch as it bakes. Give it a good stir and marvel at that gorgeous hue.
- Cream the Butter and Sugar: In a large mixing bowl, using a hand mixer or stand mixer fitted with the paddle attachment, beat the softened butter and granulated sugar together on medium-high speed. We’re looking for light and fluffy, which takes about 3-4 minutes. This step is crucial for texture! Scrape down the sides of the bowl once to make sure everything is incorporated.
- Add the Egg: Crack in your room-temperature egg. Beat on medium speed until it’s fully blended in, about 30 seconds. The mixture might look a little curdled, but that’s totally okay—it’ll come together in the next step.
- Combine Everything with Care: Here’s the gentle part. With the mixer on low speed, add about one-third of your dry ingredients to the butter mixture. Mix until just combined. Then, pour in half of the green buttermilk mixture. Mix. Repeat: another third of the dry, the rest of the wet, and finally, the last of the dry. Mix each addition until *just* combined, and stop as soon as you don’t see streaks of flour. Chef’s Golden Rule: Overmixing is the enemy of tender cupcakes! A few small lumps are fine.
- Fill and Bake: Using a spoon, cookie scoop, or even a measuring cup, divide that beautiful green batter evenly among the 12 lined cups. They should be about ⅔ full. This gives them space to rise into perfect domes. Slide the tin into the center of your preheated oven and set your timer for 18 minutes.
- The Toothpick Test: At 18 minutes, open the oven (don’t slam it!) and insert a toothpick into the center of a cupcake. If it comes out with a few moist crumbs clinging to it, they’re done. If it’s wet, give them another 1-2 minutes. They typically take 18-20 minutes total. The tops will spring back lightly when touched.
- Cool Completely (The Hardest Part!): Let the cupcakes cool in the tin for 5 minutes, then transfer them to a wire rack. This is vital! You must let them cool completely before frosting. If they’re even slightly warm, the glorious cream cheese frosting will melt right off.
- Make the Frosting: While they cool, beat the softened cream cheese and butter together on medium speed until completely smooth and creamy, about 2 minutes. Scrape the bowl. Turn the mixer to low and gradually add the sifted powdered sugar. Once it’s incorporated, add the vanilla, then beat on medium-high for another 1-2 minutes until fluffy and dreamy.
- Frost and Decorate! Once the cupcakes are completely cool, it’s time for the fun part! You can spread the frosting on with a knife, dollop it with a spoon, or for a bakery-style look, pipe it on using a piping bag fitted with a star or round tip. Go wild!
How to Serve These Emerald Beauties
Presentation is the final flourish of love! I love arranging these cupcakes on a simple cake stand or a rustic wooden board. For a St. Patrick’s Day party, sprinkle the tops with a little gold sanding sugar, green sprinkles, or even tiny chocolate gold coins. For a spring gathering, top each one with a fresh raspberry, a delicate edible flower, or a sprinkle of pastel-colored nonpareils.
These cupcakes are rich and sweet, so I love serving them with a cup of strong coffee, a cold glass of milk, or even a light and bubbly prosecco for the adults. They’re the star of the show, so keep the plating simple and let their vibrant color shine!
Make It Your Own: Fun Twists & Swaps
Love the base recipe? Let’s play! Here are a few ways to customize your Green Velvet Cupcakes:
- Matcha Green Velvet: For a natural green color and an earthy flavor, replace the liquid food coloring with 1-2 tablespoons of high-quality culinary matcha powder. Sift it in with your dry ingredients. The flavor is sophisticated and unique!
- Gluten-Free Green Velvet: Easily swap the all-purpose flour for your favorite 1:1 gluten-free baking blend. The result is just as tender and delicious.
- Lemon Cream Cheese Frosting: Add a bright, springy twist! Add the zest of one lemon and a tablespoon of fresh lemon juice to the frosting ingredients. It cuts through the sweetness beautifully.
- “Black Velvet” Version: For Halloween, use black cocoa powder (it has a deeper color and Oreo-like flavor) and black gel coloring for stunningly dark, dramatic cupcakes.
- Mini Cupcakes: Perfect for parties! Use a mini muffin tin, fill cups halfway, and bake for 10-12 minutes. You’ll get about 24-30 adorable two-bite treats.
Chef Emily’s Notebook Scribbles
This recipe is my happy place. Over the years, I’ve learned that using gel coloring is the absolute game-changer for that vibrant color. I also sometimes add a tiny pinch of cinnamon to the dry ingredients for an extra warm note—it’s a secret my grandma would approve of. The frosting can be made a day ahead and stored in the fridge; just let it come to room temperature and re-whip it briefly before piping. And a funny story: I once accidentally used salted butter in the frosting, and you know what? A few taste-testers actually loved the extra salty-sweet punch! So don’t stress perfection. Baking is about joy, and sometimes the happy accidents are the best part.
Your Questions, Answered!
Q: My green color faded after baking! What happened?
A: This usually means you used liquid food coloring. It’s mostly water, which evaporates and leaves behind a dull color. For a vibrant, bakery-style green that stays true, gel or paste food coloring is a must.
Q: Can I make this as a cake instead?
A: Absolutely! Double the recipe and divide the batter between two greased and floured 8-inch round cake pans. Bake at 350°F for 25-30 minutes, or until a toothpick comes out clean.
Q: My frosting is too soft/runny. How can I fix it?
A> First, make sure your cream cheese and butter were properly softened, not melted. If it’s still soft, your kitchen might just be warm. Pop the frosting bowl in the fridge for 20-30 minutes to firm up, then re-whip. You can also add a touch more sifted powdered sugar, a quarter cup at a time.
Q: How do I store these cupcakes?
A> Because of the cream cheese frosting, they need to be refrigerated in an airtight container. Let them sit at room temperature for 20-30 minutes before serving for the best texture and flavor. They’re best enjoyed within 3 days.
Nutritional Information (Approximate, Per Cupcake)
Please note, these are estimates based on the specific ingredients used. Your results may vary.
- Calories: 310
- Total Fat: 16g
- Total Carbohydrates: 38g
Protein: 4g
Fiber: 1g
Sugar: 27g
Sodium: 220mg
These cupcakes are meant to be a treat—not an everyday snack—and that’s exactly what makes them special. Rich, tender, and indulgent in the best way, they’re the kind of dessert you savor slowly (or go back for seconds… no judgment here).
Final Thoughts from My Kitchen to Yours 💚
If there’s one thing I hope you take away from this recipe, it’s this: baking should feel joyful, not intimidating. These Green Velvet Cupcakes aren’t about perfection—they’re about delight. About that moment when you open the oven and see a tray of vibrant green cupcakes rising proudly. About the smiles when someone takes their first bite and says, “Wait… these are REALLY good.”
They’re festive without being gimmicky, classic with a playful twist, and endlessly adaptable for whatever you’re celebrating—St. Patrick’s Day, spring birthdays, baby showers, or just a Tuesday that needs a little sparkle.
So go ahead—make them messy, frost them generously, sprinkle them with abandon. Share them with people you love (or keep a couple just for you). Because the best recipes aren’t just about ingredients—they’re about memories in the making.
Happy baking, friend 💚
—Chef Emily