Protein Cocoa Nib Crunch Cups: A Delicious Fusion of Flavor and Nutrition
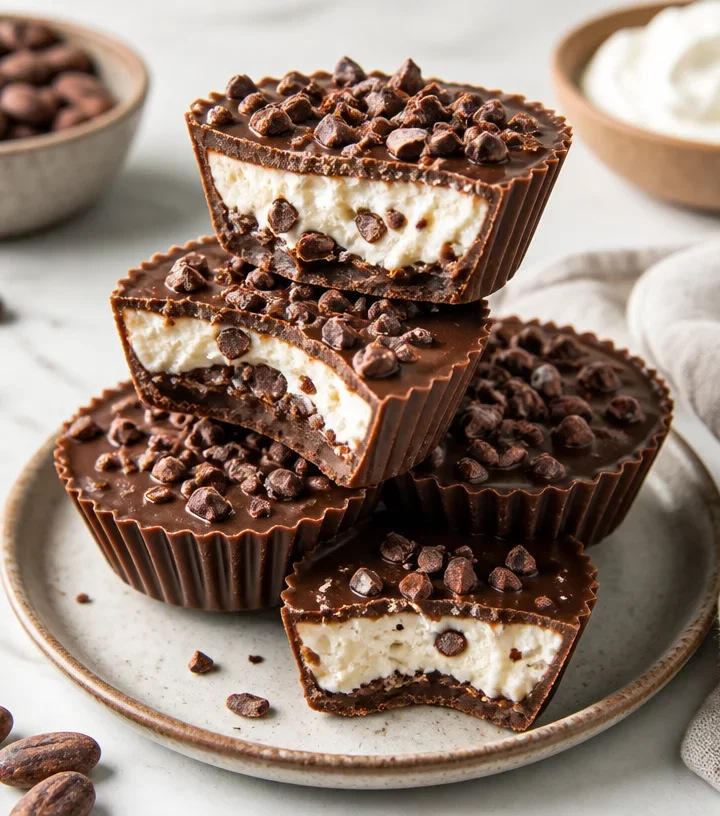
Hey there, fellow food lovers! 💖 Are you craving something that satisfies your sweet tooth but also packs a healthy punch? Well, you’re in luck because today we’re diving into the world of Protein Cocoa Nib Crunch Cups! Picture this: a delightful mixture of chocolatey goodness, crunchy textures, and nutrient-packed ingredients all in one bite-sized treat. Trust me, you’ll want to share (or hide them all for yourself!).
A Sweet, Crunchy Memory
Before we get into the nitty-gritty of making these sweet treats, let me take you back to a sun-kissed afternoon in my grandma’s kitchen. The scent of chocolate wafting through the air always meant one thing: it was baking day! While I was a mischievous little thing, sneaking bites of cookie dough, my grandma would whip up all kinds of deliciousness. One of her favorite treats was chocolate clusters, filled with nuts and some mystery crunchy thing she never revealed. Those afternoons taught me an important lesson: food is not just about nourishment; it’s about joy, connection, and a bit of nostalgia sprinkled in.
As I grew older and ventured into the culinary world, I realized I could reinterpret those childhood delights while keeping a focus on health and nutrition. So, when I hunkered down to create these Protein Cocoa Nib Crunch Cups, I dove back into that memory of warmth and sweetness, making sure to infuse some of that childhood magic into each delectable bite.
Ingredients
Now, let’s gather our ingredients! Here’s what you’ll need to whip up these Protein Cocoa Nib Crunch Cups—along with some chef tips to help you customize this recipe!
-
1 cup almond butter (or peanut butter)
Creamy or crunchy? The choice is yours! Almond butter gives a slightly nuttier flavor, while peanut butter adds a classic touch. Just make sure it’s natural and smooth for easy mixing! -
1/2 cup honey (or maple syrup)
For a plant-based option, maple syrup is a fantastic substitute. Both sweeteners add the right amount of gooeyness and sweetness to bind everything together. -
1/2 cup rolled oats
These add a chewy texture and a fiber boost. If you’re gluten-free, make sure to use certified gluten-free oats! -
1/4 cup cocoa nibs
Cocoa nibs are little nuggets of chocolatey goodness packed with antioxidants. You can replace these with dark chocolate chips if you want a sweeter version! -
1/4 cup protein powder (vanilla or chocolate flavor)
Protein powder gives these cups an extra nutritious kick! Choose your favorite—whey, plant-based, or any other kind you love! -
1/4 teaspoon sea salt
A little salt amplifies the sweetness and balances the flavors beautifully! -
1/4 cup chopped nuts (almonds, walnuts, or pecans)
Adding some chopped nuts increases the crunch factor! You can mix and match or go nut-free if allergies are a concern. -
2 tablespoons chia seeds (optional)
Chia seeds not only provide a nutritious boost with omega-3s but also act as a binding agent when mixed with the other ingredients. Feel free to skip them if you want a smoother texture!
Step-by-Step Instructions
Let’s roll up those sleeves and get to cooking! Here’s how to make your own Protein Cocoa Nib Crunch Cups, step by step.
-
Prep Your Muffin Tin:
Start by greasing a muffin tin lightly with coconut oil or cooking spray. This will help your cups pop out easily later! -
Mix the Nut Butter and Sweetener:
In a medium bowl, combine the almond (or peanut) butter and honey (or maple syrup). This mix is your sticky base, ensuring everything binds nicely. Use a spatula to mix it thoroughly until smooth—think creamy dessert goodness! If your nut butter is on the thicker side, warm it in the microwave for 10-15 seconds to make it easier to stir. -
Add the Dry Ingredients:
Next up, add the rolled oats, cocoa nibs, protein powder, sea salt, nuts, and optional chia seeds. Mix everything together until every ingredient is evenly coated with the nut butter-sweetener mixture. This step is crucial—it will make sure each bite is packed with flavor! -
Scoop the Mixture:
Using a tablespoon or cookie scoop, portion out the mixture into your prepared muffin tin. Press down firmly into each compartment using your fingers or the back of the scoop. This creates a compact structure that will hold up well once chilled. -
Chill and Set:
Pop the muffin tin into the refrigerator or freezer (if you’re in a rush) for about 30-60 minutes. This allows the cups to set nicely. Trust me, waiting is the hardest part! -
Remove from the Tin:
After chilling, gently pry each cup out using a butter knife or your fingers. They should release easily thanks to that bit of oil you used at the beginning. If they seem stubborn, leave them out at room temperature for a few minutes. -
Enjoy or Store:
These crunchy delights can be enjoyed immediately or stored in an airtight container. They can last up to a week in the fridge (if you can resist them that long)!
Serving Suggestions
Now that you’ve got your gorgeous cups ready, let’s chat about presentation! You can serve these Protein Cocoa Nib Crunch Cups in several delightful ways.
-
On a Platter: Arrange them on a beautiful serving dish, perhaps with a sprinkle of extra cocoa nibs or chopped nuts on top for an added touch of elegance.
-
As an Energy Snack: Pack them up in snack bags for a quick energy boost during a hike or a gym session! They’re perfect for satisfying a mid-afternoon craving without the guilt.
-
As a Dessert: Drizzle some melted dark chocolate over the top and garnish with a sprinkle of sea salt for a decadent dessert that feels indulgent but is still great for you!
Recipe Variations
Feeling adventurous? Here are some creative twists you can try with these Protein Cocoa Nib Crunch Cups:
-
Nut-Free Version: Substitute almond or peanut butter with sunflower seed butter for a nut-free option everyone can enjoy.
-
Add A Crunch: Add crushed pretzels or puffed rice for an extra satisfying crunch!
-
Sweeten It Up: Experiment with other natural sweeteners. Agave syrup or coconut sugar can change the flavor profile beautifully!
-
Spice It Up: Throw in a dash of cinnamon or espresso powder for a surprising flavor boost!
-
Fruit Fusion: Mix in some dried fruits like cranberries or cherries for a chewy contrast to the crunch!
Chef’s Notes
As a chef, I’m all about evolution in the kitchen. The original idea for these cups came from my love for quick snacks. A bite-sized treat that nourishes? Sign me up! Since creating the original recipe, I’ve played around with various flavors and textures—but I always come back to the classic version. The joy is in experimenting and finding your favorite combo!
One time, I forgot to add the honey and they turned out a tad too dry. Instead of tossing them, I crunched them up and used them as a granola topping on yogurt. Sometimes, mistakes lead to the best kitchen inspirations!
FAQs and Troubleshooting
Got questions? No worries! Here are a few common ones that pop up when making these protein-filled delights:
1. My cups fell apart when I took them out of the muffin tin! What did I do wrong?
This often means they weren’t pressed tightly enough together. Make sure to pack the mixture firmly into the muffin tin compartments for optimal structure!
2. Can I use liquid sweeteners instead of honey or maple syrup?
Absolutely! You can use agave nectar, but keep in mind that it may change the overall texture slightly.
3. How can I make these vegan?
You can easily substitute the honey with maple syrup, and ensure you’re using plant-based protein powder.
4. What’s the best way to store leftovers?
Keep them in an airtight container in the fridge for up to a week! You can also freeze them for longer-lasting snacks. Just thaw a few minutes before gobbling them up!
Nutritional Info
Each Protein Cocoa Nib Crunch Cup is packed with nutritious goodness. On average, one cup has:
- Calories: ~120
- Protein: ~6g
- Carbohydrates: ~10g
- Fats: ~7g
- Fiber: ~2g
Making them not just a guilt-free indulgence, but an energy-packed snack that keeps you going!
Final Thoughts
There you have it, my friends! A delicious recipe for Protein Cocoa Nib Crunch Cups that’s easy, fun, and oh-so-satisfying. Whether you’re preparing for a busy week ahead or just want to whip up a treat for your friends, these cups tick all the boxes.
Remember, cooking is all about experimentation and joy. Don’t be afraid to infuse your personality into these cups, mix up flavors, and make them your own. As you embark on your cooking adventures, I’m here cheering you on! So grab that fork, stay cozy in your kitchen, and let’s chow down on something delicious together. Happy cooking! 🎉
Print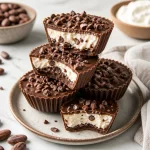
Protein Cocoa Nib Crunch Cups
- Total Time: 45 minutes
- Yield: 12 servings 1x
- Diet: Vegetarian
Description
A delightful mixture of chocolatey goodness, crunchy textures, and nutrient-packed ingredients all in one bite-sized treat.
Ingredients
- 1 cup almond butter (or peanut butter)
- 1/2 cup honey (or maple syrup)
- 1/2 cup rolled oats
- 1/4 cup cocoa nibs
- 1/4 cup protein powder (vanilla or chocolate flavor)
- 1/4 teaspoon sea salt
- 1/4 cup chopped nuts (almonds, walnuts, or pecans)
- 2 tablespoons chia seeds (optional)
Instructions
- Prep Your Muffin Tin: Start by greasing a muffin tin lightly with coconut oil or cooking spray.
- Mix the Nut Butter and Sweetener: In a medium bowl, combine the almond (or peanut) butter and honey (or maple syrup).
- Add the Dry Ingredients: Next up, add the rolled oats, cocoa nibs, protein powder, sea salt, nuts, and optional chia seeds.
- Scoop the Mixture: Using a tablespoon or cookie scoop, portion out the mixture into your prepared muffin tin.
- Chill and Set: Pop the muffin tin into the refrigerator or freezer for about 30-60 minutes.
- Remove from the Tin: After chilling, gently pry each cup out using a butter knife or your fingers.
- Enjoy or Store: These crunchy delights can be enjoyed immediately or stored in an airtight container.
Notes
For a nut-free option, substitute almond or peanut butter with sunflower seed butter.
- Prep Time: 15 minutes
- Cook Time: 0 minutes
- Category: Snack
- Method: No-Bake
- Cuisine: American
Nutrition
- Serving Size: 1 cup
- Calories: 120
- Sugar: 8g
- Sodium: 50mg
- Fat: 7g
- Saturated Fat: 1g
- Unsaturated Fat: 5g
- Trans Fat: 0g
- Carbohydrates: 10g
- Fiber: 2g
- Protein: 6g
- Cholesterol: 0mg
Keywords: protein snacks, healthy treats, no-bake recipes, energy snacks