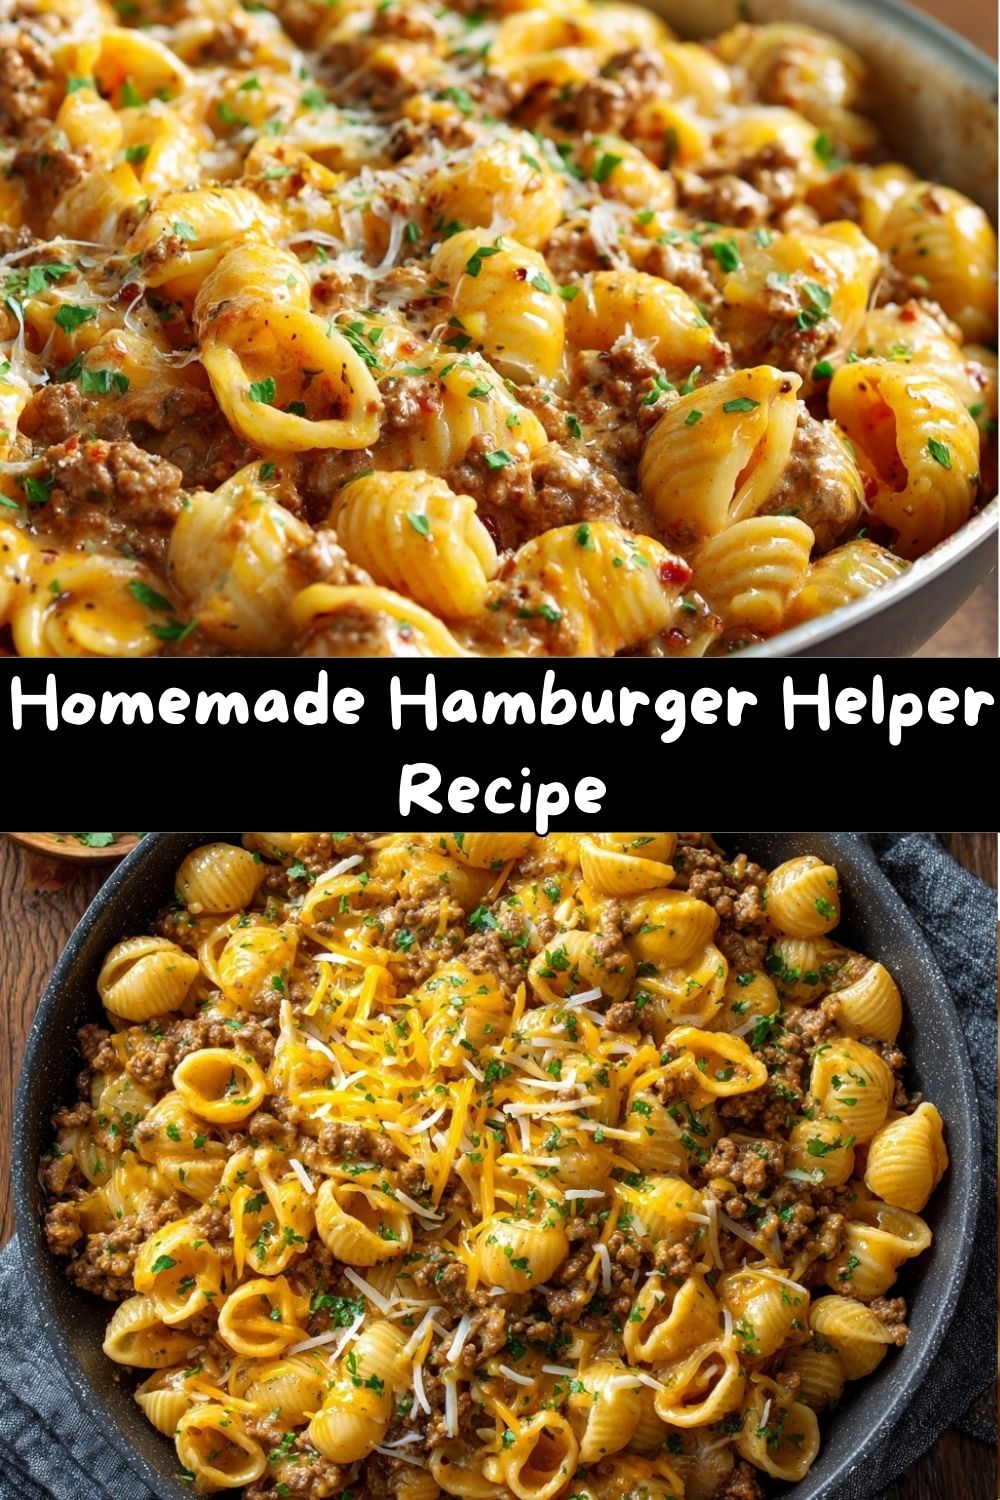
Homemade Hamburger Helper: The 30-Minute, One-Pot Wonder Your Weeknights Need
Hey there, friend! Come on in, the virtual kitchen is warm and there’s a fork with your name on it. Let’s be real for a second: how many times have you stood in front of the pantry or stared into the fridge at 6 PM, with hungry faces (including your own!) looking at you, and wished for a dinner that was fast, comforting, and absolutely guaranteed to please?
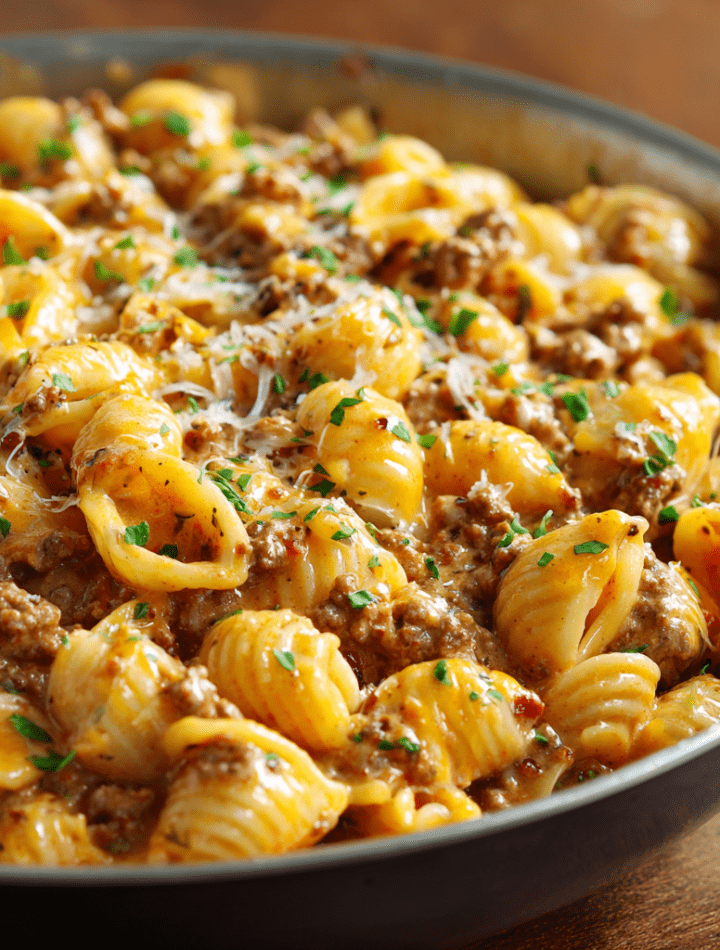
I’ve been there more times than I can count. That’s why today, we’re ditching the box (you know the one) and making magic from scratch. We’re talking about my Homemade Hamburger Helper – a One-Pot Cheeseburger Pasta that’s ready in 30 minutes flat. This isn’t just a recipe; it’s your new weeknight superhero. Imagine tender pasta shells swimming in a rich, velvety, sharp cheddar cheese sauce, all wrapped around perfectly seasoned ground beef. It’s creamy, it’s cheesy, it’s nostalgic, but oh-so-much better because you made it. Every ingredient is one you know and can pronounce. So, grab your favorite big pot or deep skillet, and let’s turn a hectic evening into a happy, belly-filled one. Trust me, the only thing easier than making this is convincing everyone to go back for seconds.
A Box, a Grandma, and the Start of a Love Affair
This recipe always takes me right back to my grandma’s linoleum kitchen floor. She was a from-scratch wizard, but even she had her secret weapons for rainy days or when us grandkids were running her ragged. I can still hear the sound of that cardboard box shaking, the powdery cheese packet hitting the counter. To me, it was the sound of pure joy. We’d brown the beef together, her letting me “sneak” a tiny piece straight from the pan. We’d stir in the milk and watch the sauce magically appear. It was our little ritual.
Years later in culinary school, I found myself deconstructing those flavors, chasing that specific comfort. I realized the magic wasn’t in the mystery powder, but in the concept: hearty beef, creamy sauce, tender pasta—all in one pot. It was genius! So, I set out to rebuild it with real, whole ingredients, adding layers of flavor my grandma would approve of (like a dollop of tomato paste for depth and a whisper of smoked paprika for warmth). This recipe is my love letter to those simple, happy meals of childhood, upgraded just enough for the cook (and eater) I am today. It’s the hug in a bowl we all need sometimes.
Gather Your Flavor Makers: The Ingredients List
Here’s everything you’ll need to build this flavor masterpiece. Don’t worry, it’s all simple stuff! I’ve added my little chef-y notes and swaps so you can make this recipe your own.
- 1 lb ground beef (80/20 blend is ideal): This gives you great flavor and just enough fat to build a delicious sauce. Chef’s Swap: Ground turkey, chicken, or even plant-based crumbles work beautifully here!
- 1 tablespoon olive oil: Just a splash to get our onions sizzling.
- 1 small onion, diced: The sweet, savory base of our sauce. Don’t skip it! A yellow or white onion is perfect.
- 2 cloves garlic, minced: Because… garlic. Always garlic. Use the pre-minced stuff from the jar if you’re in a pinch—I won’t tell.
- 1 tablespoon tomato paste: This is our SECRET WEAPON for rich, umami depth. It’s not a tomato sauce flavor, just a deep, savory backbone. Chef’s Tip: Look for tomato paste in a tube—you can use a tablespoon and keep the rest in the fridge for weeks!
- 1 teaspoon smoked paprika: Adds a warm, smoky whisper that makes the beef sing. Regular paprika works, but smoked is a game-changer.
- 1 teaspoon mustard powder: This little powerhouse brightens the cheese sauce and cuts through the richness. No powder? A teaspoon of Dijon mustard added with the liquids works too.
- Salt and black pepper to taste: Season as you go! Taste before adding the cheese at the end.
- 2 cups small pasta shells: They’re perfect for catching all that cheesy goodness. Elbows, cavatappi, or rotini are great too.
- 2 cups beef broth: This builds our cooking liquid with tons of meaty flavor. Use low-sodium if you’re watching salt.
- 1 1/2 cups whole milk: Whole milk gives us the creamiest result. Chef’s Swap: 2% works fine, or for extra richness, use half milk, half half-and-half. For dairy-free, unsweetened almond or oat milk works, but the sauce will be slightly thinner.
- 2 cups shredded sharp cheddar cheese: The star! I highly recommend shredding a block yourself. Pre-shredded cheese has anti-caking agents that can make your sauce a little grainy. For the best melt, grab a block of sharp or extra-sharp cheddar.
Let’s Get Cooking: Your Step-by-Step Roadmap to Cheesy Bliss
Alright, apron on? Let’s do this! Grab your largest, deepest skillet or a Dutch oven—this is a one-pot wonder, after all.
- The Flavor Foundation: Heat the olive oil in your pot over medium heat. Add the diced onion and cook, stirring occasionally, for about 3-4 minutes until it becomes soft and translucent. You’re not looking for color, just tenderness. This sweetens them up and builds our base.
- Brown That Beef: Add the ground beef to the pot with the onions. Break it up with your spoon or a spatula and cook until it’s no longer pink, about 5-7 minutes. If there’s a lot of excess fat (more than a tablespoon or two), you can drain it off. I like to leave a little for flavor!
- Bloom the Spices (A Chef Hack!): Push the beef to the sides a bit. Add the minced garlic, tomato paste, smoked paprika, mustard powder, a big pinch of salt, and a few cracks of black pepper right into the center. Let it cook for just 30-60 seconds. You’ll smell the garlic and spices waking up—this “blooms” them and makes their flavor pop!
- Stir everything together so the beef is coated in all that flavorful paste.
- The Big Pour: Add the dry pasta shells, beef broth, and milk. Give it a really good stir, making sure to scrape up any browned bits from the bottom of the pan (that’s pure flavor gold!). Bring the whole thing to a lively boil.
- Simmer to Perfection: Once boiling, immediately reduce the heat to low. Cover the pot with a lid. Let it simmer for 12-15 minutes, stirring once or twice to prevent sticking, until the pasta is tender and has absorbed most of the liquid. The sauce will still look a bit loose—that’s perfect for the cheese!
- The Cheesy Grand Finale: Take the pot completely off the heat. This is crucial! Adding cheese to too-high heat can cause it to seize up. Now, sprinkle in your shredded cheddar, a handful at a time, stirring continuously until it’s all melted into a smooth, luscious, orange-hued sauce. Taste it—does it need another pinch of salt or pepper? Now’s the time to adjust.
Dishing It Up: How to Serve Your Masterpiece
You did it! Now, let’s make it pretty (or just deliciously messy—both are valid). Ladle that steamy, cheesy pasta into deep bowls. This is where you can have fun:
I love a little fresh chopped parsley or chives on top for a pop of color and freshness. A final sprinkle of extra shredded cheese never hurt anybody. For a bit of crunch and tang, a handful of thinly sliced green onions or crispy fried onions are amazing. If you’re feeling fancy, a dollop of sour cream or a drizzle of hot sauce takes it to the next level.
This is a hearty, complete meal in a bowl, but if you want to round it out, a simple green side salad with a sharp vinaigrette cuts through the richness beautifully. Garlic bread is also never a wrong answer. Ever.
Make It Your Own: Delicious Twists & Swaps
One of the best things about this recipe is its versatility. Play with it! Here are a few of my favorite riffs:
- The Lighter Lift: Use 93% lean ground turkey or chicken and swap the beef broth for chicken broth. It’s just as comforting but a tad lighter.
- Vegetarian Vibes: Skip the meat! Sauté an extra onion and add 8 oz of sliced mushrooms with it. Use vegetable broth and stir in a can of drained, rinsed lentils or another cup of your favorite veggies (like peas or broccoli florets) with the pasta.
- Spicy Southwest Style: Add 1 tsp chili powder and 1/2 tsp cumin with the paprika. Swap half the cheddar for pepper jack cheese. Top with diced avocado, jalapeños, and a squeeze of lime after cooking.
- Bacon Cheeseburger Edition: Cook 4 slices of chopped bacon in the pot first, remove, then use the bacon fat to cook the onions. Crumble the bacon back in at the end with the cheese. You’re welcome.
- Gluten-Free Goodness: Use your favorite gluten-free pasta (like brown rice elbows) and ensure your broth and other ingredients are GF-certified. The method stays exactly the same.
Emily’s Kitchen Notes & Stories
This recipe has seen some things in my kitchen! The first time I tested it, I got over-zealous with the pepper and my then-boyfriend (now husband) drank two glasses of water with dinner while politely saying it had “a real kick.” Lesson learned: season in stages! I’ve also learned that the type of pot matters. A thin-bottomed skillet might need a slightly lower heat to prevent the pasta from sticking. My enameled Dutch oven is my MVP for this job.
The biggest evolution? The cheese. I used to just dump it all in. Now I know that taking the pot off the heat and adding it gradually is the key to that velvety, restaurant-style sauce that doesn’t get oily or grainy. It’s a small step with a huge payoff. This dish is now my daughter’s most-requested “special dinner,” and that, to me, is the highest compliment a recipe can get.
Your Questions, Answered (Before You Even Ask!)
Q: My sauce is too thin/runny. What happened?
A: No panic! It likely just needs to thicken up. Simmer it uncovered for an extra 3-5 minutes, stirring often. The pasta will continue to absorb liquid. Also, let it sit for 5 minutes off the heat before serving—it thickens as it cools slightly.
Q: My pasta is still hard after 15 minutes!
A> Different pasta brands and pot materials can affect cook time. Just add a splash more broth or water (about 1/4 cup), cover, and simmer for another 3-5 minutes, checking frequently.
Q: Can I make this ahead of time or freeze it?
A> You can! It will thicken significantly as it cools in the fridge. When reheating, add a splash of milk or broth and warm it over low heat, stirring well. It freezes okay for up to a month, but the pasta texture will be softer upon reheating. Thaw in the fridge overnight before warming.
Q: The cheese got stringy/clumpy. Help!
A> This usually means the heat was too high when you added it. Always remove the pot from the heat first. Next time, try shredding your own cheese from a block—it melts much more smoothly than pre-shredded.
A Quick Nutritional Glance
Please remember, I’m a chef, not a dietitian! The info below is an estimate generated from common ingredients and is meant to be a general guide. Your specific results will vary based on the exact brands and amounts you use, especially with variables like beef fat content and cheese type.
This recipe makes about 4 hearty servings or 6 smaller ones. Based on using 80/20 beef, 2% milk, and block cheddar, one serving (about 1/4 of the recipe) roughly contains:
- Calories: ~480
- Protein: ~28g (Great for keeping you full!)
- Carbohydrates: ~35g
- Dietary Fiber: ~2g
- Sugars: ~5g (mostly from the milk and onions)
- Fat: ~25g
To lighten it up, use lean ground beef or turkey, low-fat cheese, and increase the serving of veggies on the side. Food is about joy and nourishment—enjoy every cheesy bite!
Final Thoughts from My Kitchen to Yours
And there you have it—your ticket to a stress-free, delicious, and deeply satisfying dinner that comes together in the time it takes to watch a sitcom. This Homemade Hamburger Helper proves that from-scratch cooking doesn’t have to be complicated or time-consuming. It’s about taking a simple concept and filling it with real, love-infused ingredients.
I hope this recipe finds its way into your regular rotation, becomes the dinner you make when you need a guaranteed win, and maybe even starts a little tradition of your own. The best part of sharing recipes like this is imagining all the cozy kitchens it’ll be cooked in and all the happy bellies it’ll fill. So, from my messy-apron world to yours, thank you for cooking with me. Now, go chow down!
Made with love,
Chef Emily Walker