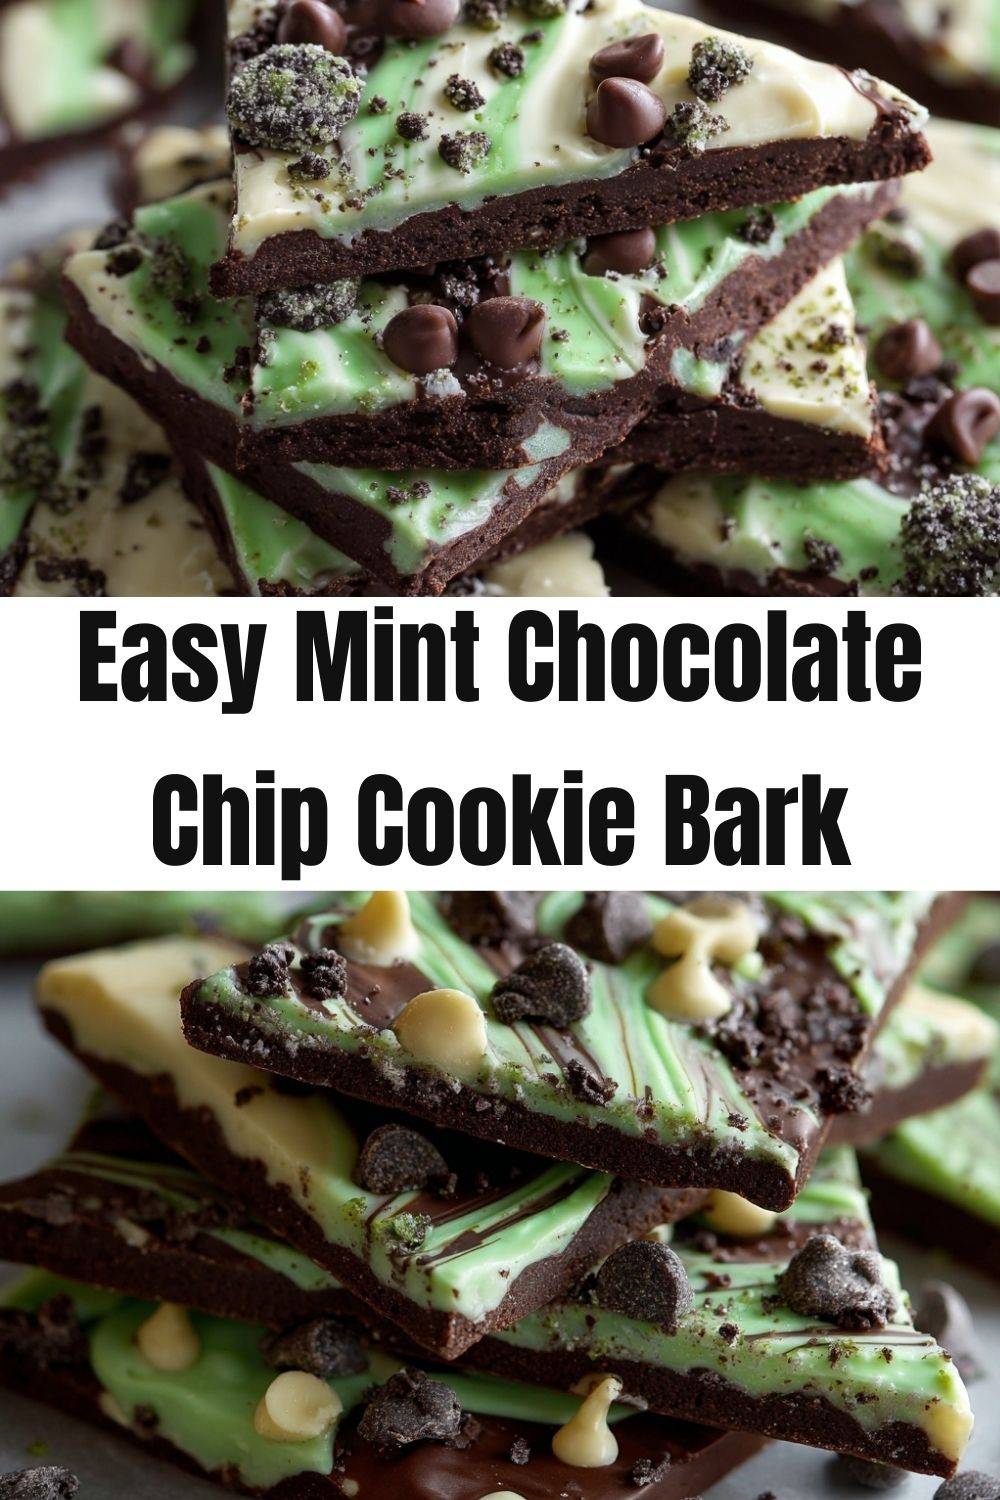
Mint Chocolate Chip Cookie Bark: Your New Favorite No-Bake Treat
Hey there, friend! Emily here, waving from my flour-dusted kitchen. Are you having one of those days? You know the ones—where you’re scrolling through your phone, dreaming of something sweet, minty, and chocolaty all at once, but the thought of preheating the oven and washing a mountain of bowls just feels… like a lot. I hear you. I’ve been there more times than I can count.
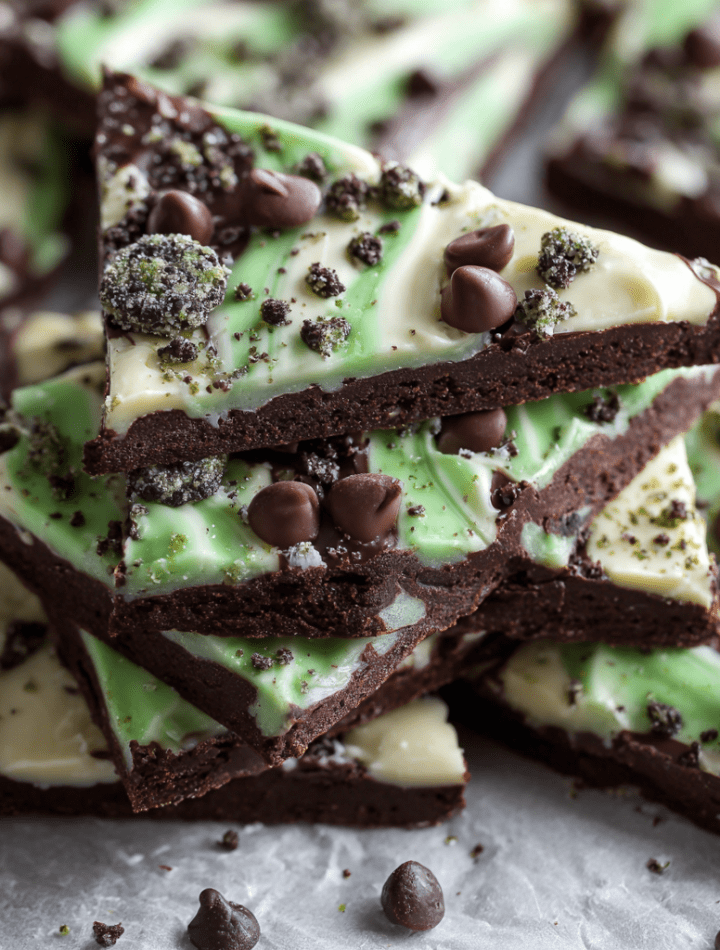
That’s exactly why I’m obsessed with this Mint Chocolate Chip Cookie Bark. It’s the dessert hero we all need. Imagine the best parts of a mint chocolate chip ice cream cone and your favorite chewy cookie, transformed into a stunning, shareable (or not-so-shareable) sheet of chocolatey magic. We’re talking rich, dark chocolate, a swirly layer of cool minty white chocolate, crunchy cookie bits, and those adorable mini chocolate chips. Every bite is a perfect symphony of texture and flavor.
The absolute best part? It’s a no-bake, no-stress situation. You just melt, swirl, sprinkle, and chill. In about an hour, you go from “I need something sweet” to “I am a dessert genius.” So, let’s ditch the complicated baking projects for a minute and make something incredibly delicious, together. Your taste buds—and your inner cool, calm, collected chef—will thank you.
The Sound of Summer & The Taste of Mint
This recipe always takes me right back to my grandma’s kitchen on a blazing hot July afternoon. We’d hear the distant, magical jingle of the ice cream truck turning onto our street. My sister and I would scramble for loose change, sprint to the curb, and without fail, I’d always get the mint chocolate chip ice cream bar. That first crisp bite through the chocolate shell into the cool, creamy, bright green center was pure joy.
Years later in culinary school, I was determined to capture that feeling in a new form. One late night, practicing tempering chocolate (and maybe making a bit of a mess), I accidentally swirled some mint-infused white chocolate into a batch of dark. I tossed in some crushed cookies from my backpack snack stash for texture. When it set and I broke off a piece… bam. It was that same magical combination: deep chocolate, refreshing mint, and a satisfying crunch. It was my childhood summer, reimagined. This bark is my happy little accident turned into a recipe I just had to share with you.
Gathering Your Bark-Making Magic
Here’s everything you need to create this minty masterpiece. The beauty is in the simplicity! I’ve added my little chef notes to help you shop and substitute like a pro.
- 200g (7 oz) Dark or Semi-Sweet Chocolate, chopped: This is our flavor foundation. I love a good 60-70% dark chocolate here—it balances the sweetness perfectly. Chef’s Insight: Using a bar you chop yourself melts more evenly than chips, which have stabilizers. But chocolate chips will work in a pinch!
- 150g (5 oz) White Chocolate, chopped: The creamy canvas for our mint flavor. Go for real white chocolate (check for cocoa butter in the ingredients) for the best texture and melt. Substitution Tip: If you’re not a white chocolate fan, you can use vanilla almond bark or even green candy melts for fun color.
- 1 tsp Peppermint Extract: This is where the iconic “chip” flavor comes alive! Use extract, not oil, for the right intensity. Chef’s Warning: Start with ¾ tsp and taste—peppermint can be powerful! You can always add more.
- Green Food Coloring (a few drops): Purely for that classic, whimsical mint chip look. Gel food coloring gives vibrant color without thinning the chocolate. This is totally optional—your bark will taste amazing without it!
- 6–8 Mint Chocolate Cookies (like Thin Mints or Mint Oreos), crushed: The “cookie” in our cookie bark! They add an incredible crunchy texture and double down on the mint-chocolate theme. Fun Twist: Try using grasshopper cookies or even mint-filled sandwich cookies for a creamier surprise.
- ¼ cup Mini Chocolate Chips: These little guys add pops of pure chocolate and a delightful bumpy texture. They’re the final, classic mint chip touch. I use semi-sweet minis, but dark or milk would be lovely too.
Let’s Make Some Bark! (Step-by-Step)
Put on your favorite apron (the messy one is welcome here), and let’s get swirling. Follow these steps, and you simply cannot go wrong.
- Prep Your Stage: Line a standard baking sheet (about 9×13 inches) with parchment paper. Smooth out any wrinkles for a nice clean bark back. No parchment? A silicone baking mat is a fantastic reusable option. This little step guarantees easy release and zero mess.
- Melt the Dark Chocolate: Place your chopped dark chocolate in a microwave-safe bowl. Microwave in 30-second bursts, stirring vigorously between each burst, until it’s completely smooth and glossy. Chef’s Hack: You can also use a double boiler if you’re nervous about microwaving. The key is low, gentle heat and constant stirring—burnt chocolate is a sad thing.
- Create the Base Layer: Pour the melted dark chocolate onto your prepared sheet. Use an offset spatula or the back of a spoon to spread it into a thin, even layer, about ¼ inch thick. Don’t worry about perfect edges—rustic is charming! Work relatively quickly before the chocolate starts to set.
- Minty Green Magic Time: In a separate completely dry bowl, melt your white chocolate using the same gentle method. Once smooth, stir in the peppermint extract. Now, add a drop or two of green food coloring and stir until you get a lovely minty hue. Add more color drop by drop until you’re happy.
- The Artistic Swirl: Dollop spoonfuls of your green mint chocolate all over the dark chocolate base. Now, take a toothpick or the tip of a sharp knife and gently drag it through the dollops to create beautiful swirls and marbled patterns. This is your moment to be a pastry artist! Don’t over-swirl, or the colors will muddle.
- The Big Sprinkle: Immediately after swirling, while the chocolate is still wet, generously sprinkle the crushed mint cookies and mini chocolate chips all over the top. Gently press them in slightly so they adhere. This adds that essential crunch-in-every-bite element.
- The Patience Game (The Hardest Part!): Carefully transfer the baking sheet to your refrigerator. Let it chill, undisturbed, for 30-45 minutes, or until the bark is completely firm to the touch. Pro Tip: Don’t rush this by putting it in the freezer, as it can cause condensation and make the chocolate “sweat” later.
- Break & Revel: Once fully set, remove the bark (it should lift easily with the parchment). Place it on a cutting board and use your hands to break it into rustic, irregular pieces. Alternatively, you can carefully crack it with a knife for more controlled shapes. Then, do a little victory dance—you made bark!
How to Serve Your Mint Chocolate Masterpiece
This bark is a superstar all on its own, piled high on a platter. But let’s talk presentation and pairing!
For a party, I love arranging the pieces in a wide, shallow bowl or on a slate board. It looks abundant and inviting. If you’re gifting it (lucky friend!), layer pieces between parchment in a cute tin or mason jar.
What to enjoy with it? A cold glass of milk is the classic, nostalgic pairing. For the adults, a cup of strong black coffee or a rich stout beer makes the chocolate flavors sing. It’s also incredible crumbled over a scoop of vanilla bean ice cream—trust me on this.
5 Fun Ways to Mix It Up
Once you’ve mastered the classic, have fun playing with these twists! Cooking is all about making it your own.
- Candy Cane Crush: For a holiday version, swap the peppermint extract for vanilla, omit the green coloring, and use crushed candy canes or peppermint candies instead of the mint cookies. Festive and gorgeous!
- Matcha Mint Swirl: Love matcha? Replace the green food coloring with 1-2 teaspoons of high-quality matcha powder sifted into the melted white chocolate. You’ll get an earthy, sophisticated green hue and flavor.
- Dark Chocolate Sea Salt: Feeling less minty? Skip the mint entirely. After spreading the dark chocolate, sprinkle it with a little flaky sea salt before adding the white chocolate swirl. A simple, elegant, and addictive variation.
- Cookie Dough Dream: Sprinkle the wet bark with mini chocolate chips and tiny pieces of edible cookie dough (make sure it’s egg-free for safety!). It’s like two desserts in one.
- Vegan & Dairy-Free Delight: Use high-quality vegan dark and white chocolates. Check that the cookies are vegan (many sandwich cookies are!), and use dairy-free mini chips. Everyone gets to enjoy the magic.
Emily’s Kitchen Notes
This recipe has been my go-to “emergency dessert” for years, and it’s evolved from that messy culinary school experiment. I’ve learned that the quality of chocolate truly matters—it’s the star of the show. I’ve also had my share of “oops” moments, like the time I used mint oil instead of extract (whoa, mouth freeze!) or tried to speed-chill it in the freezer, only to get a cloudy, weepy bark. We live and we learn!
Now, I always make a double batch. One for now, and one to stash in the fridge for later. It keeps my willpower in check… sometimes. The beauty of this bark is its flexibility. Don’t have the exact cookies? Use what you have! The spirit is fun, easy, and delicious.
Your Questions, Answered!
Q: My white chocolate seized up and got chunky when I added the extract/food coloring. What happened? How can I fix it?
A: This is super common! Chocolate seizes when it comes into contact with even a tiny bit of moisture. To prevent it, make sure your bowl and utensils are completely dry. If it happens, don’t panic. Try stirring in a teaspoon of melted coconut oil or vegetable shortening. It might not be perfect, but it should smooth out enough to use. Next time, let the melted white chocolate cool for a minute before adding extras.
Q: Can I freeze the bark for longer storage?
A: Absolutely! Once set and broken, store it in an airtight container or freezer bag with parchment between layers. It will keep beautifully for up to 2 months. Thaw in the fridge for 15 minutes before serving to prevent condensation.
Q: Why is there a white, dusty film on my chocolate after it sets?
A> That’s called “bloom.” It happens when chocolate is exposed to temperature changes or moisture (like being cooled too quickly in the freezer). It’s completely safe to eat and the flavor is unchanged—it just doesn’t look as shiny. Proper chilling in the fridge (not freezer) on a dry day helps prevent it.
Q: How long does bark last at room temperature?
A> In a cool, dry place (not a hot kitchen!), it will stay crisp and fresh for about a week in an airtight container. But let’s be real… it’s never lasted that long in my house!
Mint Chocolate Chip Cookie Bark
- Total Time: ~1 hour
- Yield: 12 Pieces 1x
Description
Craving something sweet, minty, and ridiculously easy? This Mint Chocolate Chip Cookie Bark has you covered. It layers rich dark chocolate with crushed mint cookies and a swirl of green mint-flavored white chocolate—finished with mini chocolate chips for that perfect cookie-and-cream-meets-mint-chip vibe. No oven, no stress, just minty dessert magic in every bite!
Ingredients
200g (7 oz) dark or semi-sweet chocolate, chopped
150g (5 oz) white chocolate, chopped
1 tsp peppermint extract
Green food coloring
6–8 mint chocolate cookies (like Thin Mints or Mint Oreos), crushed
¼ cup mini chocolate chips
Instructions
Line a baking sheet with parchment paper.
Melt dark chocolate and spread in a thin, even layer on the prepared sheet.
Melt white chocolate, stir in peppermint extract and a few drops of green food coloring.
Drizzle or dollop green mint chocolate over the dark layer. Use a toothpick to swirl.
Sprinkle crushed cookies and mini chocolate chips over the top.
Chill for 30–45 minutes or until fully set. Break into pieces and enjoy!
- Prep Time: 10 minutes
- Chill Time: 45 minutes
Nutrition
- Calories: 150 / Piece
- Sugar: 13g / Piece
- Fat: 9g / Piece
- Carbohydrates: 16g / Piece
- Protein: 1g / Piece
Nutritional Information*
Here’s a general breakdown per piece (based on 12 pieces from the batch). Remember, this is an indulgent treat meant to be savored!
Calories: ~150 | Fat: 9g | Carbohydrates: 16g | Sugar: 13g | Protein: 1g
*Please note: Nutritional information is an estimate calculated using an online tool and will vary based on the specific brands and quantities of ingredients you use. For precise dietary needs, it’s always best to calculate using your exact products.
Final Thoughts from My Kitchen to Yours
And there you have it, my friend—the simplest, most satisfying mint chocolate chip dessert that requires exactly zero baking bravery. I hope this recipe brings a little spark of joy to your kitchen, just like it does to mine. It’s proof that the most delicious things often come from a place of fun, a bit of experimentation, and a serious love for flavor.
I’d love to see your beautiful, swirly creations! Did you add a twist? Did your kids help with the sprinkling? Tag me on social @TastyChow with #TastyChowBark so I can celebrate with you. Now, go break off a big piece of that minty, crunchy, chocolatey bark. You’ve earned it.
Until next time, keep your spoons handy and your heart hungry,
— Emily 🍃🍫