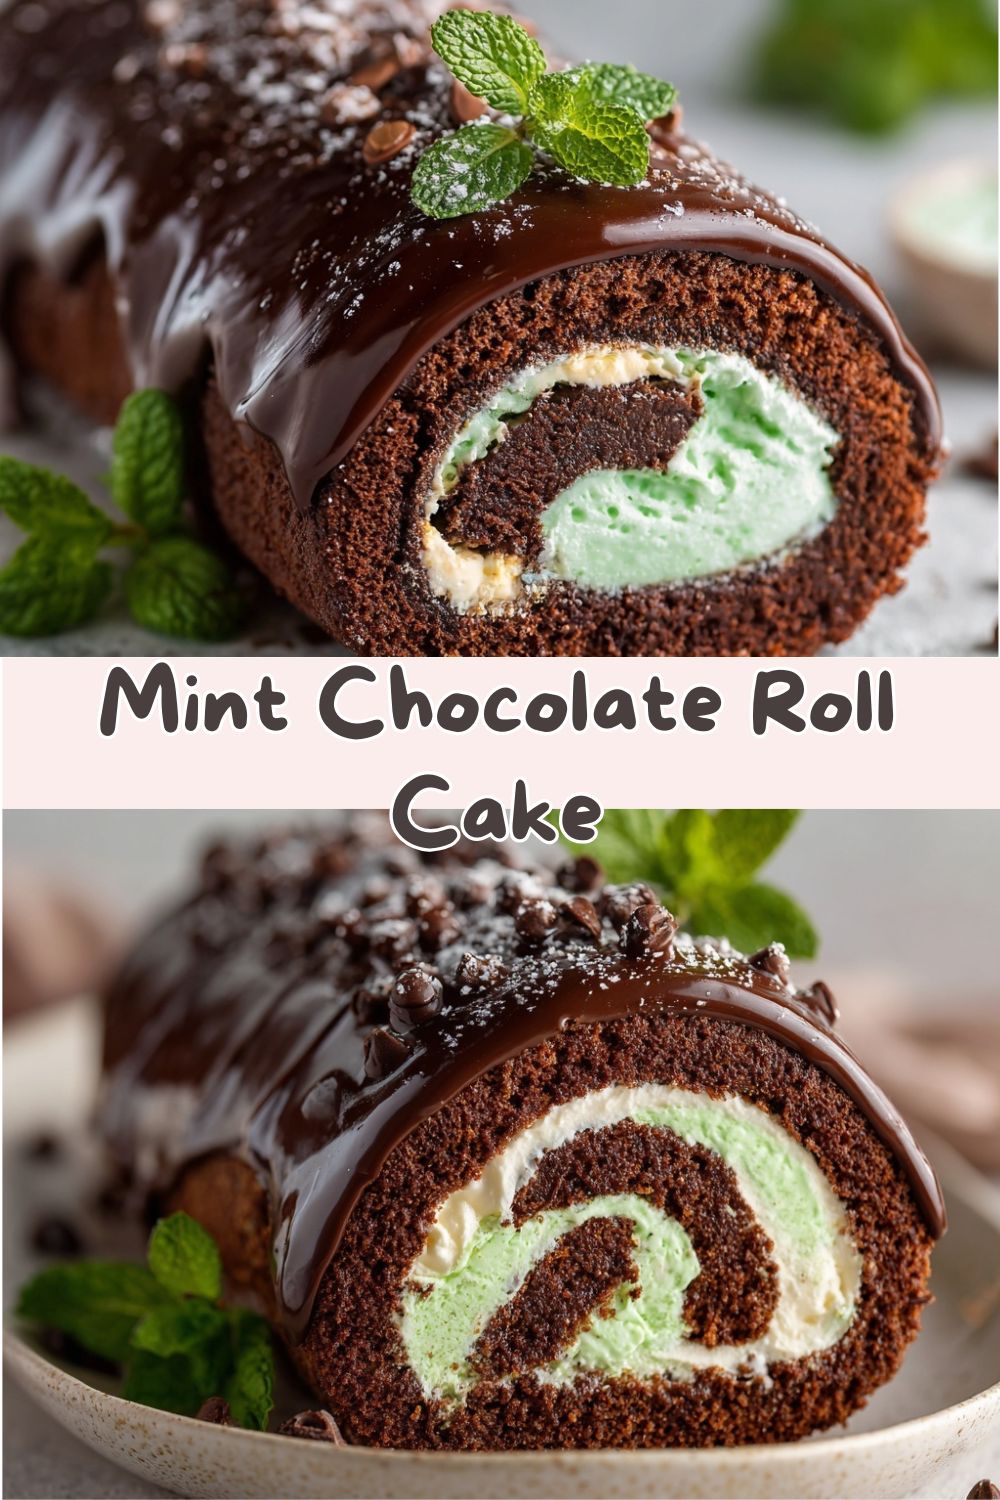
Mint Chocolate Roll Cake: Your New Favorite Slice of Happiness
Hey there, friend! Come on in, pull up a stool, and let’s talk about one of life’s greatest pairings: mint and chocolate. I don’t know about you, but something magical happens when cool, refreshing mint meets rich, decadent chocolate. It’s like a little party in your mouth, and everyone’s invited. Today, I’m beyond excited to share my recipe for a show-stopping, soul-satisfying, gorgeous Mint Chocolate Roll Cake.
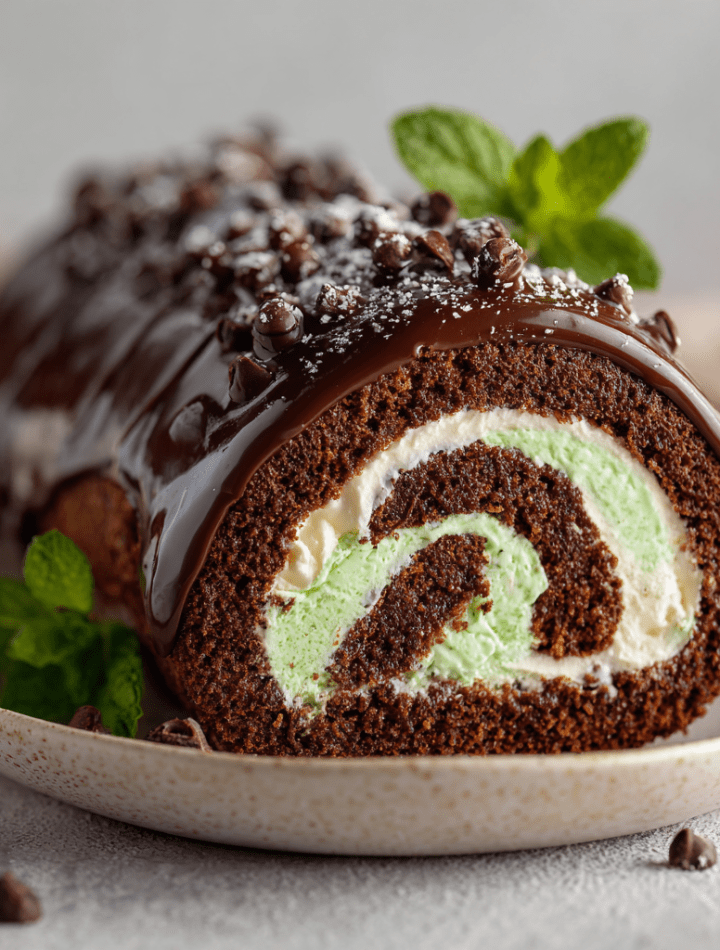
Now, I see you. Maybe you’re looking at that picture of a perfect spiral and thinking, “Emily, that’s bakery-level fancy. I could never.” Well, I’m here to grab your hand, pass you a whisk, and tell you with 100% confidence: you absolutely can. This isn’t a fussy, temperamental dessert. This is a friendly, forgiving cake that wants to be your new go-to for birthdays, holidays, potlucks, or just because it’s Tuesday and you deserve something spectacular. We’re talking about a cloud-soft chocolate sponge, hugging a pillow of fluffy, minty cream, all wrapped up in a sleek, shiny chocolate ganache coat. It’s cool, it’s creamy, it’s fudgy, and it’s perfectly minty. So, tie on that apron (the messy one is always the best), and let’s make something delicious that will have everyone asking, “You made this?!”
A Tale of Two Flavors: My Minty-Chocolatey Awakening
This cake takes me right back to my grandma’s linoleum floor, where I’d sit and watch her work her magic. She wasn’t a fancy pastry chef, but she was a wizard with flavors. One scorching summer afternoon, she presented not a pie, not cookies, but a humble, lopsided roll cake. The smell of chocolate filled the kitchen, but when she sliced it, a pale green ribbon of mint cream peeked out. I was skeptical—mint was for toothpaste and gum, not cake!
One bite changed everything. The cool mint cut through the deep chocolate in a way that was utterly refreshing and indulgent at the same time. It was a revelation. My grandma just winked and said, “See? Opposites attract, even in food.” That slightly messy, utterly delicious cake taught me that the best recipes often come from a place of playful experimentation. This Mint Chocolate Roll Cake is my love letter to that moment—polished up a bit, but with the same joyful, surprising heart. Every time I make it, I think of her, that warm kitchen, and the lesson that the most memorable food is usually the most fun.
Gathering Your Delicious Arsenal
Here’s everything you’ll need to create this minty masterpiece. I’ve added my little chef-y notes next to each one because knowing your ingredients is half the battle won!
For the Chocolate Sponge Cake:
- 3 large eggs, at room temperature: This is non-negotiable! Room temp eggs whip up much higher and give the cake its essential airy structure. If you forgot, place them in a bowl of warm water for 10 minutes.
- ¾ cup granulated sugar: We’ll whip this with the eggs to create a thick, pale ribbon. This is the foundation of our light sponge.
- 2 tsp brewed coffee or water: A tiny bit of coffee is my secret weapon—it doesn’t make the cake taste like coffee, it just makes the chocolate flavor sing louder and deeper. Water works perfectly if you’re avoiding caffeine.
- 1 tsp pure vanilla extract: The backbone of flavor. It rounds out all the other notes beautifully.
- ¼ cup unsweetened cocoa powder: Use the best you have! Natural or Dutch-processed cocoa both work here for a rich, dark canvas.
- ¾ cup all-purpose flour: Spoon and level it into your measuring cup to avoid a dense cake. No one wants a brick roll!
- 1 tsp baking powder: Our other leavening helper for that perfect rise.
- ¼ tsp salt: Balances the sweetness and makes all the flavors pop.
- Powdered sugar, for rolling: This is our insurance policy against sticking. Be generous!
For the Mint Cream Filling:
- 1 cup heavy whipping cream, COLD: I can’t stress “cold” enough. Chill your bowl and beaters too. Cold cream whips up light and holds its shape.
- 4 tbsp powdered sugar: Sweetens and stabilizes our cream just a touch.
- ½–¾ tsp peppermint extract: Start with ½ tsp, then taste! Peppermint can vary in strength. You want a clear, cool flavor, not a mouthful of toothpaste.
- Green food coloring (optional): A drop or two makes that minty center look as delightful as it tastes. Gel coloring gives vibrant color without thinning the cream.
- ⅓ cup mini chocolate chips: They add little bursts of fudgy texture. Toss them in a bit of flour first to help them stay suspended in the filling instead of sinking.
For the Glossy Ganache Topping:
- 2 cups milk chocolate chips: The creamy sweetness of milk chocolate pairs wonderfully with mint. Semi-sweet works if you prefer a darker finish.
- 1¼ cups heavy cream: When warmed and poured over the chocolate, it creates that luxurious, pourable ganache.
- ½ tsp vanilla extract & ¼ tsp peppermint extract: A final whisper of minty-vanilla flavor right in the glaze. Perfection!
Let’s Bake! Your Step-by-Step Roadmap to Success
Okay, team. Deep breath. We’re doing this together, step-by-step. Read through once, then let’s get our bake on!
Step 1: Prep & Preheat. First things first: line a 10×15-inch jelly roll pan with parchment paper, letting a little overhang on the short sides. This will be your cake lifter later! Preheat your oven to 350°F (175°C). An accurate oven temp is key for a thin, even bake.
Step 2: Whip It Good (The Eggs & Sugar). In a large bowl, beat the room-temperature eggs and granulated sugar with an electric mixer on high speed. Here’s the visual cue you’re looking for: beat for a full 4-5 minutes until the mixture is thick, pale yellow, and falls off the beaters in a slow “ribbon” that holds its shape for a few seconds on the surface. This ribbon stage is the secret to a spongy, flexible cake that won’t crack when rolled.
Step 3: Gently Does It (Adding Flavors & Dry Ingredients). With the mixer on low, beat in the coffee (or water) and vanilla until just combined. Now, sift your cocoa powder, flour, baking powder, and salt right over the egg mixture. Why sift? It prevents lumps and incorporates everything evenly without deflating our precious air bubbles. Use a spatula to gently fold the dry ingredients into the wet. Fold until you no longer see streaks of flour—a few small lumps are okay! Overmixing is the enemy of a light sponge.
Step 4: Bake & Watch. Pour the batter into your prepared pan and spread it into an even layer with your spatula. Tap the pan lightly on the counter to release any big air bubbles. Bake for 10-12 minutes. The cake is done when the top springs back lightly when touched. Do not overbake! A dry cake cracks.
Step 5: The Strategic Roll (This is the fun part!). While the cake bakes, lay a clean, thin kitchen towel on the counter and dust it generously with powdered sugar. As soon as the cake comes out of the oven, run a knife around the edges to loosen it. Then, invert it immediately onto your sugared towel. Carefully peel off the parchment paper. Starting at one short end, use the towel to gently but firmly roll the cake up (with the towel inside). Let it cool completely rolled up like this. This “training roll” gives the cake muscle memory, so it rolls later with the filling like a pro!
Step 6: Make the Minty Cloud (The Filling). In that chilled bowl, beat the cold heavy cream, powdered sugar, and peppermint extract until soft peaks form. Add a drop of food coloring if using. Fold in the mini chocolate chips. Pop this in the fridge while the cake cools.
Step 7: Fill & Final Roll. Once the cake is completely cool, carefully unroll it. It’s okay if it stays slightly curled. Spread the mint cream evenly over the cake, leaving a small border on all sides. Now, using the towel to guide you, re-roll the cake (without the towel this time!) as tightly as you can. Place it seam-side down on a wire rack set over a baking sheet (to catch ganache drips). Chill for at least 30 minutes to let it set.
Step 8: The Glossy Finish (Ganache). Place chocolate chips in a heatproof bowl. Heat the cream in a saucepan until it’s steaming and just starts to simmer around the edges. Pour the hot cream over the chocolate, add the extracts, and let it sit for 3 minutes. Then, whisk slowly from the center out until you have a smooth, glossy ganache. Let it cool for 5-10 minutes until it thickens slightly but is still pourable.
Step 9: The Grand Finale. Pour the ganache over the chilled cake roll, using an offset spatula to coax it over the sides. Let it set for a few minutes, then decorate with extra mini chips or a dusting of powdered sugar if you like. Slice with a sharp knife wiped clean between cuts for perfect slices!
How to Serve This Stunning Swirl
Presentation is part of the joy! For those “wow” moments, place each slice on a simple white plate. A little dollop of extra whipped cream on the side never hurts, and maybe a fresh mint leaf for a pop of green. This cake is rich, so slices can be modest—it’s incredibly satisfying. It pairs beautifully with a cup of black coffee to balance the sweetness or a cold glass of milk for the ultimate nostalgic treat. It’s the star of any dessert table, so let it shine!
Make It Your Own: Fun Twists & Swaps
Love the base recipe? Let’s play! Here are some of my favorite ways to switch it up:
- Cookies & Cream Roll: Swap the mint extract for 1 tsp vanilla. Fold ¾ cup of crushed Oreo pieces into the whipped cream filling. Use a dark chocolate ganache for topping.
- Peppermint Patty: Add a layer of thin, soft peppermint patties or Andes mints over the mint cream before rolling for an extra-intense mint-chocolate experience.
- White Chocolate Mint: Use white chocolate chips in the ganache for a sweeter, creamier finish. It looks stunning against the dark cake.
- Dairy-Free Delight: Use your favorite plant-based heavy cream alternative (one that whips well!) for the filling and ganache. Ensure your chocolate chips are dairy-free.
- Mocha Mint Magic: Add 1 tbsp of instant espresso powder to the dry cake ingredients for a subtle coffee kick that loves hanging out with mint and chocolate.
From My Kitchen to Yours: Chef Emily’s Notes
This recipe has been my happy experiment for years. The first time I tried it, I was so nervous about the roll that I overbaked the cake slightly. Let’s just say it made a delicious, if crumbly, “deconstructed” mint chocolate cake parfait! The lesson? Embrace the imperfections. Every roll tells a story. I’ve found that letting the ganache cool just enough so it’s like warm pancake syrup is the perfect consistency for that drip-down-the-sides look we all love. Most importantly, have fun. Put on some music, maybe sneak a few chocolate chips, and enjoy the process. That joy bakes right into the cake, I swear.
Your Questions, Answered!
Q: Help! My cake cracked when I rolled it. What went wrong?
A: Don’t panic! This is the #1 question. Cracking usually means the cake was slightly overbaked (dry) or cooled completely before the initial “training roll.” Remember to roll it in the towel *while it’s still warm and flexible*. If you have a small crack, don’t worry—the filling and ganache are fantastic spackle and will hide a multitude of sins!
Q: Can I make this ahead of time?
A: Absolutely! You can bake the cake, roll it in the towel, and let it cool. Wrap the whole roll (towel and all) tightly in plastic wrap and refrigerate for up to a day. Make the filling and ganache the day you plan to serve for the freshest taste and texture. The assembled cake keeps beautifully in the fridge, covered, for 2-3 days.
Q: My ganache is too runny/thick. How do I fix it?
A: Ganache is all about ratios and temperature. If it’s too runny, let it sit at room temperature to cool and thicken, stirring occasionally. If it gets too thick to pour, you can gently re-warm it in 5-second bursts in the microwave, stirring between each, until it’s pourable again.
Q: Can I freeze the roll cake?
A> You can! Wrap the unfrosted, filled roll tightly in plastic wrap, then foil, and freeze for up to a month. Thaw overnight in the fridge before making the ganache and finishing it.
Nutritional Information (For Your Curiosity!)
Okay, let’s be real: this is a celebration dessert, meant to be savored and enjoyed! But I know some of you like to plan your indulgences. Here’s a general estimate per slice (based on 10 servings). Please note, this is an approximation as ingredients can vary.
- Calories: ~370
- Total Fat: 23g
- Saturated Fat: 14g
- Carbohydrates: 36g
- Sugar: 26g
- Protein: 4g
Remember, food is about joy, connection, and flavor first. Savor each minty, chocolatey bite mindfully, and it’s always worth it.
You Did It! Final Thoughts from My Kitchen
Look at you, you brilliant baker! You’ve just created something truly spectacular. This Mint Chocolate Roll Cake is more than just a dessert; it’s a testament to your kitchen courage. It says, “I saw something beautiful and delicious, and I made it with my own two hands.” That’s a powerful feeling.
I hope this recipe finds its way into your recipe box, gets stained with chocolate, and becomes a tradition. Share it with people you love, or keep it all for yourself with a good book—no judgment here. Thank you for baking with me today. Until next time, keep your whisks ready and your hearts hungry.
With love and a fully stocked baking cupboard,
Emily 🍫🌿