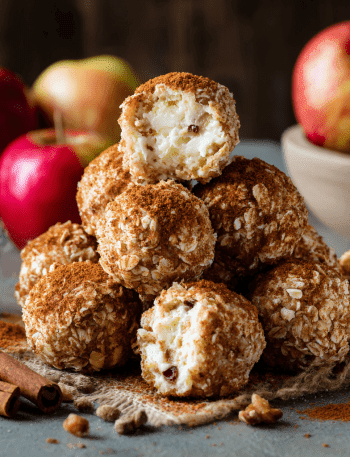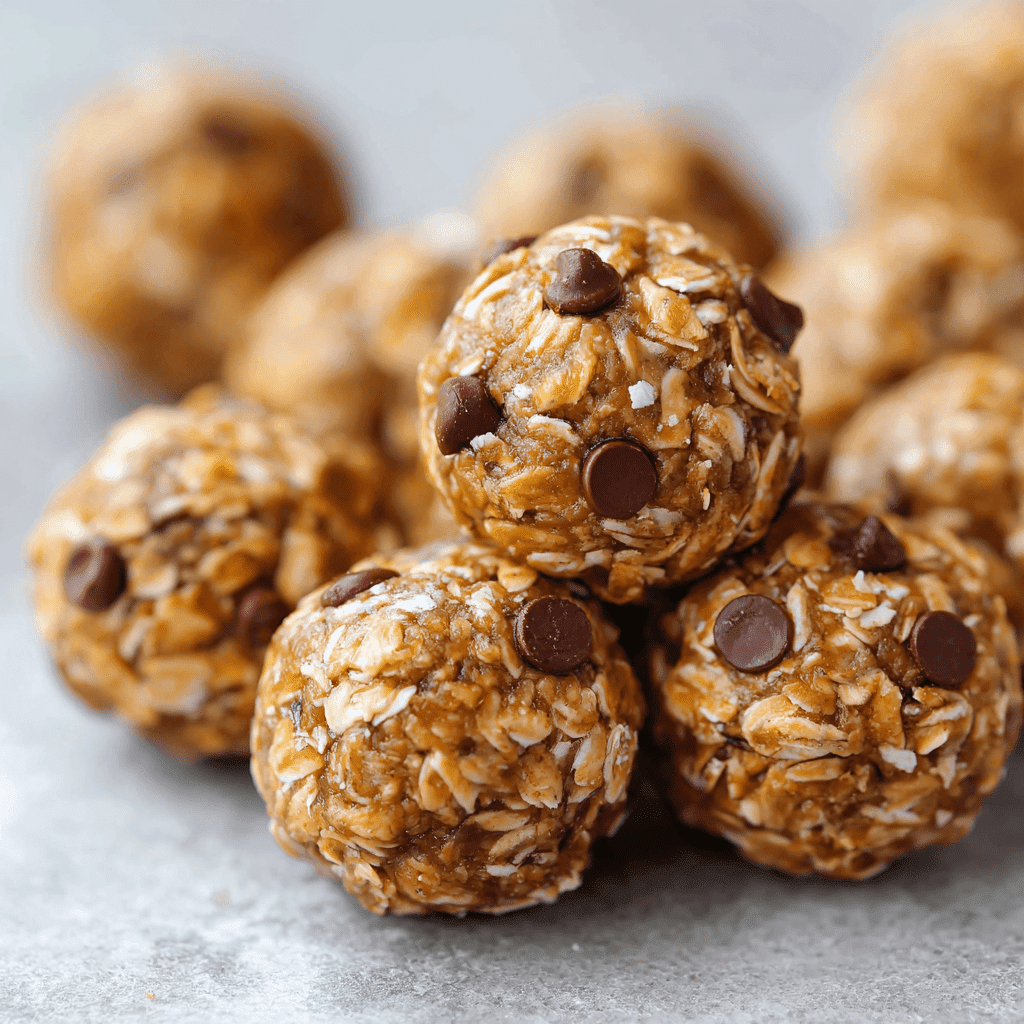
Let’s Make Some Magic: No-Bake Oatmeal Protein Balls!
Hey there, my fellow foodie friend! 👋 Can we talk about snacks for a second? I’m talking about that 3 PM slump when your stomach starts singing opera, or that post-workout hunger that hits you like a ton of bricks. You need something now. Something that’s not just a handful of empty calories but a little powerhouse of energy that actually tastes like a treat. Well, pull up a stool and get ready, because I’m about to share one of my all-time favorite kitchen hacks: my legendary No-Bake Oatmeal Protein Balls.
These little guys are my secret weapon. They’re the perfect marriage of wholesome and delicious, the kind of snack that makes you feel like you’ve got your life together even on the most chaotic days. They require zero baking (hello, cool kitchen in the summer!), they come together in about 10 minutes, and they are seriously customizable. Whether you’re rushing out the door, need a quick pick-me-up, or are just craving something sweet without the guilt, these protein balls are your answer. They’re chewy, a little sweet, packed with good-for-you stuff, and honestly? They taste like cookie dough. I mean, what’s not to love? So, tie that messy apron on, and let’s make a batch of edible energy that will become your new best friend.
The Messy Kitchen That Started It All
This recipe takes me right back to my culinary school days. Picture this: a tiny apartment kitchen, textbooks stacked on the counter, and me, covered in more flour than a donut. I was constantly running between classes, internships, and my part-time job, and I was always hungry. I needed fuel that could keep up with me, but my budget was, let’s say… creatively limited.
One desperate afternoon, I stared into my nearly bare pantry—a canister of oats, a almost-empty jar of peanut butter, and some honey. I started throwing things together, my grandma’s old wooden spoon in hand, not aiming for gourmet but for survival. What emerged from that chaotic mixing bowl was a revelation! These dense, chewy, energy-packed bites were an instant hit with my roommates and became my go-to. They’ve evolved since then (thank goodness), but that spirit of simple, heartfelt, no-fuss cooking is still baked—or, well, not baked—right into every single one. It’s a reminder that the best recipes often come from a place of happy necessity.
Gathering Your Protein Ball Dream Team
Here’s the beautiful part: you probably have most of this in your pantry right now! This is a forgiving recipe, so feel free to play around. Let’s break it down:
- 1 ½ cups Rolled Oats (Old-Fashioned): This is our base, providing heartiness and fiber. Chef’s Insight: Don’t use quick oats! They absorb too much moisture and can make the balls gummy. Rolled oats give you the perfect chewy texture.
- ½ cup Nut Butter: The glue that holds it all together! I love creamy peanut butter for that classic flavor, but almond butter or cashew butter work beautifully for a different twist. Substitution Tip: Sunflower seed butter is a fantastic nut-free option!
- ⅓ cup Honey or Maple Syrup: This is our natural sweetener and another binding agent. Honey gives a richer flavor, while pure maple syrup keeps it vegan. Chef’s Insight: If your honey is super thick, warm it up for a few seconds in the microwave to make it easier to mix.
- ½ cup Protein Powder: The star of the show for that energy boost! Vanilla or chocolate are my go-tos. Substitution Tip: If you don’t have protein powder, you can substitute with an additional ½ cup of oats, though the protein content will be lower.
- ¼ cup Mini Chocolate Chips or Raisins (optional): Because joy is an essential ingredient! Mini chips distribute better than large ones. Raisins add a nice natural sweetness and chew.
- ½ tsp Cinnamon: A warm, cozy flavor that makes everything better.
- 1 tsp Vanilla Extract: The flavor enhancer—always use the real stuff!
- Pinch of Salt: Crucial for balancing all the sweetness and making the flavors pop.
- 1–2 tbsp Milk (any kind): This is our secret weapon for getting the perfect texture. You might not need it, but it’s there to save the day if your dough is too dry.
Let’s Get Rolling: Your Foolproof Steps
Ready? This is so easy. No fancy equipment needed—just a bowl, a spoon, and your hands!
- Mix the Dry Crew: In a large mixing bowl, combine the rolled oats, protein powder, cinnamon, and that all-important pinch of salt. Give it a good whisk. This isn’t just busywork; it ensures every single bite is perfectly seasoned and there are no clumps of protein powder. Chef’s Hack: If your protein powder is particularly clumpy, sift it in with the oats!
- Bring in the Wet Team: Now, plop in your nut butter, honey (or maple syrup), and vanilla extract. Here’s where you get a little arm workout! Use a sturdy spoon or spatula to mix everything together. It might seem dry at first, but keep going. You’ll see it start to come together into a thick, sticky dough. Chef’s Commentary: This is the moment I always taste the dough. It’s the cook’s privilege! Adjust if needed—a little more honey? A pinch more salt? Make it yours.
- Fold in the Fun Stuff: Once your dough is combined, gently stir in your chocolate chips or raisins if you’re using them. Try not to overmix here; we just want them evenly distributed.
- The Texture Test: This is the most important step! Grab a small handful of the mixture and try to squeeze it in your palm. If it holds together easily, you’re golden. If it’s crumbly and won’t stick, it’s too dry. This is where your milk comes in. Add one tablespoon, mix thoroughly, and test again. Repeat with the second tablespoon only if necessary. You want it to be pliable but not wet or sticky.
- Shape Your Balls: Using a tablespoon cookie scoop or just your hands, portion out the dough. Roll it firmly between your palms to create smooth, 1-inch balls. Chef’s Hack: If the mixture is sticking to your hands, lightly dampen them with water. It works like a charm!
- Chill Out: Line a baking sheet or plate with parchment paper and place your beautiful protein balls on it. Pop them in the refrigerator for at least 20-30 minutes. This is non-negotiable! It allows them to firm up and set, making them much easier to eat and store.
How to Serve & Savor
Once they’re chilled and firm, the fun begins! I like to store mine in an airtight container in the fridge. They’re perfectly portable, so toss a few in a small container or a reusable bag for a healthy snack on the go. They’re amazing with a cup of coffee for a morning boost, as a pre-workout bite for sustained energy, or as a post-dinner treat to satisfy your sweet tooth without derailing your goals. They’re delicious straight from the fridge—cool, firm, and incredibly satisfying.
Mix It Up! 5 Fun Variations
The base recipe is a blank canvas! Here are some of my favorite ways to play with it:
- Cranberry Almond Joy: Use almond butter, and swap the chocolate chips for dried cranberries and a handful of slivered almonds.
- Double Chocolate Mint: Use chocolate protein powder and add ¼ tsp of peppermint extract along with the vanilla. Fold in dark chocolate chunks.
- Tropical Escape: Use vanilla protein powder and mix in ¼ cup of chopped dried pineapple, dried mango, and unsweetened coconut flakes.
- Cookie Dough Delight: Use vanilla protein powder and peanut butter. Fold in mini chocolate chips and a handful of crushed gluten-free graham crackers or butter crackers for that true cookie dough vibe.
- Seed Power (Nut-Free): Use sunflower seed butter and replace the chocolate chips with pumpkin seeds and a few chopped dried apricots.
Chef Emily’s Notes
This recipe has been with me for years, and it’s truly a living thing in my kitchen. I’ve made these balls for my niece’s soccer team, as edible gifts for new neighbors, and as a constant presence in my own fridge. One of my favorite kitchen fails-turned-win was the time I accidentally used cayenne pepper instead of cinnamon (those labels look similar at 6 AM!). Let’s just say the “Spicy Kickstart” variation was… interesting, but not recommended!
The recipe has evolved—I now always toast my oats in a dry skillet for a few minutes before mixing. It adds a incredible nutty, warm depth of flavor that takes these from great to absolutely unforgettable. Try it next time! Ultimately, these balls are about joy and convenience. Don’t stress. Taste as you go, adjust to your liking, and have fun with it. That’s what cooking is all about.
FAQs & Troubleshooting
Q: My mixture is too wet and sticky! What did I do wrong?
A: No worries! This can happen if your nut butter was particularly oily or if you added a bit too much liquid. The easy fix is to add a bit more rolled oats or protein powder, a tablespoon at a time, until the mixture is manageable and no longer sticks to your hands.
Q: Why won’t my protein balls hold their shape?
A: This is almost always a binding issue. First, make sure you chilled them for long enough—they need that time to set. If they’re still crumbly after chilling, the mixture was likely too dry. Next time, add a touch more nut butter or honey during the mixing stage until it passes the squeeze test.
Q: Can I make these without protein powder?
A: Absolutely! As mentioned in the ingredients, you can substitute the protein powder with an additional ½ cup of rolled oats. You’ll still get a delicious energy ball, just with less protein. You could also try using collagen peptides, though the texture might be slightly different.
Q: How long do these last, and how should I store them?
A: Because they are no-bake and contain perishable ingredients, they must be stored in an airtight container in the refrigerator. They will keep beautifully for up to 2 weeks. You can also freeze them for up to 3 months! Just thaw in the fridge or at room temperature for a bit before eating.
Oatmeal Protein Balls
- Total Time: 30 minutes
- Yield: 16 balls 1x
Description
These no-bake Oatmeal Protein Balls are the ultimate snack—nutritious, satisfying, and ready in minutes. Packed with whole oats, nut butter, and your favorite protein powder, they offer the perfect balance of energy and flavor. Ideal for busy mornings, post-workout boosts, or sweet-but-healthy cravings.
Ingredients
1 1/2 cups rolled oats
1/2 cup nut butter (peanut, almond, or cashew)
1/3 cup honey or maple syrup
1/2 cup protein powder (vanilla or chocolate)
1/4 cup mini chocolate chips or raisins (optional)
1/2 tsp cinnamon
1 tsp vanilla extract
Pinch of salt
1–2 tbsp milk, if needed for texture
Instructions
In a large bowl, mix oats, protein powder, cinnamon, and salt.
Stir in nut butter, honey, and vanilla until a sticky dough forms.
Add chocolate chips or raisins if using. If the mixture is too dry, stir in milk 1 tbsp at a time.
Scoop and roll into 1-inch balls using your hands.
Place on a baking sheet and chill for at least 20 minutes to set.
- Prep Time: 10 minutes
- Chill Time: 20 minutes
Nutrition
- Calories: 100 / ball
- Sugar: 6g / ball
- Fat: 5g / ball
- Carbohydrates: 10g / ball
- Protein: 5g / ball
Nutritional Information
*This is an estimate and can vary greatly based on the specific brands and ingredients you use.
Per ball (approx. 16 balls): Calories: ~100 | Carbohydrates: 10g | Fat: 5g | Protein: 5g | Sugar: 6g
Prep Time: 10 min | Chill Time: 20 min | Total Time: 30 min | Yield: 16 balls
Final Thoughts
These No-Bake Oatmeal Protein Balls are more than just a snack—they’re a little kitchen lifesaver. Quick, portable, and endlessly customizable, they’re the kind of recipe that keeps you fueled through busy afternoons, post-gym hunger, or those “I just need something sweet” moments.
What I love most is that they fit right into real life. No oven, no stress—just a bowl, a spoon, and a handful of pantry staples. Plus, they’re forgiving enough to adapt to whatever you have on hand, which means you’ll never get bored.
So the next time your energy dips or your sweet tooth calls, skip the store-bought bars and whip up a batch of these chewy, protein-packed bites instead. They’ll keep in your fridge (or freezer!) for weeks, but I can pretty much guarantee they’ll disappear long before then. Here’s to snacks that taste like cookie dough and fuel you like a champ. 🙌✨