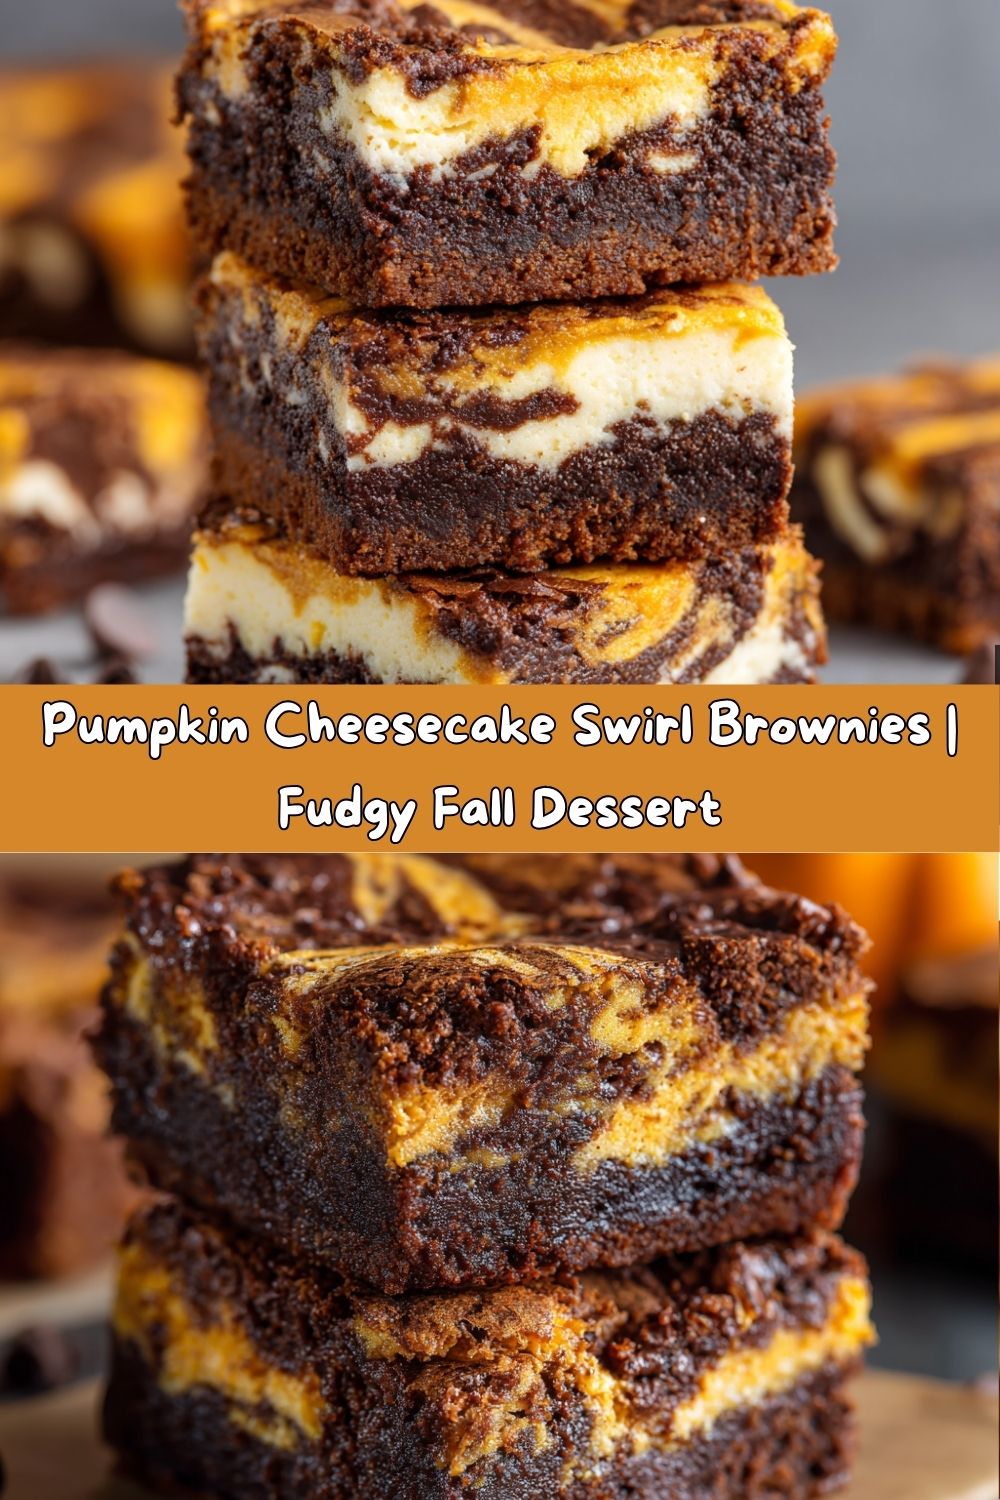
Pumpkin Cheesecake Swirl Brownies: Your New Favorite Fall Dessert
Hey there, friends! Chef Emily here, back in my happy place—the kitchen—and buzzing with excitement to share one of my all-time favorite autumn creations with you. If you’ve ever found yourself torn between the rich, chocolatey bliss of a fudgy brownie and the spiced, creamy dream that is pumpkin cheesecake, I have glorious news: you don’t have to choose. Nope, not even a little bit.
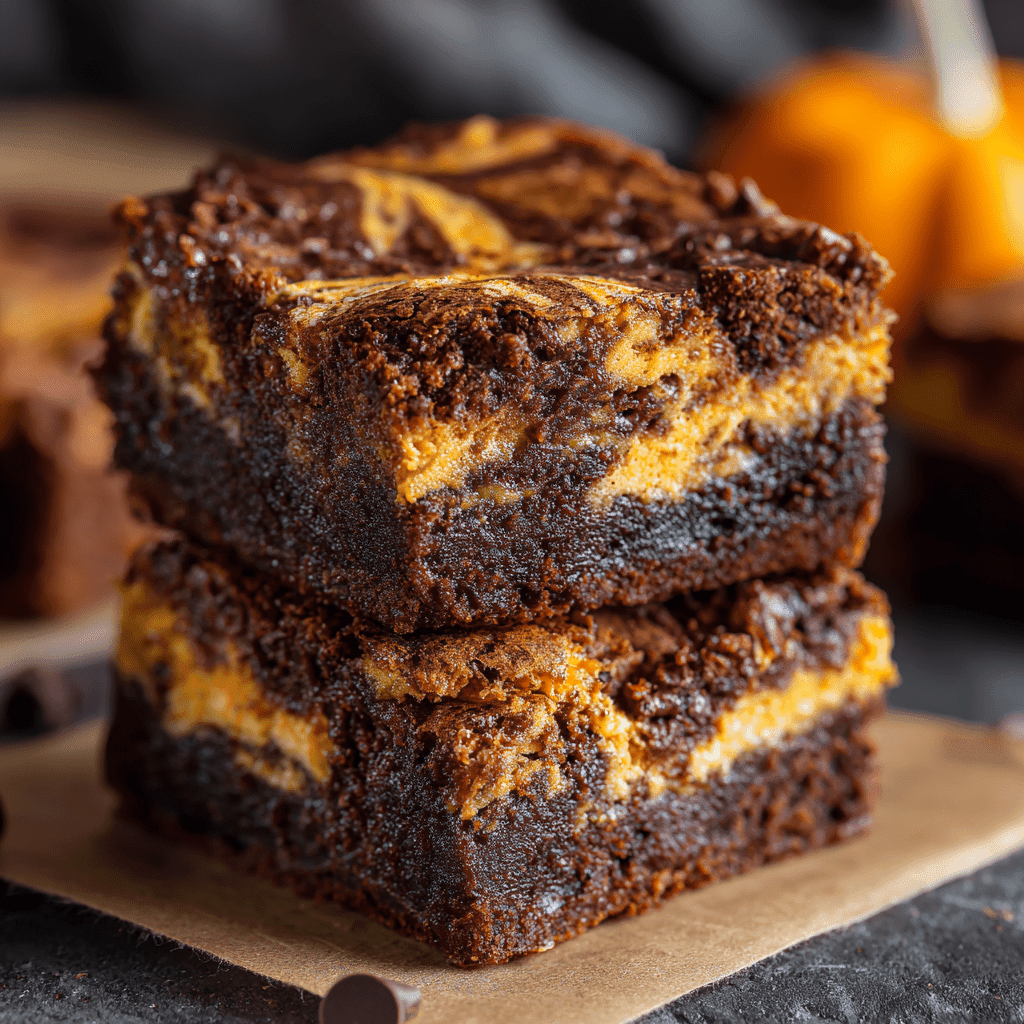
These Pumpkin Cheesecake Swirl Brownies are the stuff of legend in my house. They’re the dessert I bring to every fall potluck, the treat I sneak a slice of with my morning coffee (no judgment here!), and the recipe my friends beg for the second the leaves start to turn. We’re talking about a decadent, fudgy brownie base that’s so rich it’ll make your eyes roll back in your head, swirled with a velvety, spiced pumpkin cheesecake layer that tastes like a cozy autumn hug. The contrasting textures and flavors are nothing short of magical.
And the best part? They look like you spent all day slaving over a hot oven, but the secret is, they’re surprisingly simple to make. This is a recipe built for joy, for sharing, and for creating those little moments of pure happiness that only a truly incredible dessert can provide. So, tie on your favorite apron (the messy one with all the stains tells the best stories), preheat that oven, and let’s make something absolutely unforgettable together.
A Sweet Slice of Memory
This recipe takes me right back to my first fall out of culinary school. I was living in a tiny apartment with an even tinier kitchen, but I was determined to host Friendsgiving. I wanted to create a dessert that encapsulated everything I loved about the season. The problem? My budget was tight, and I couldn’t decide between making a classic pumpkin pie or a batch of my famous brownies.
In a moment of “what the heck” inspiration, I decided to merge them. I used the last of my good mascarpone, swirled it right into the brownie batter I knew by heart, and crossed my fingers. The result was… well, it was a bit of a messy, lopsided masterpiece. But the second my friends took a bite, the room went silent except for the sounds of happy chewing. It was a hit! That lopsided pan of brownies taught me a beautiful lesson: the best recipes often come from a place of resourcefulness, love, and a willingness to play with your food. This version is that original recipe, perfected over a decade of autumns and shared with so much love.
Gathering Your Ingredients
Here’s everything you’ll need to create this masterpiece. This is a double batch for a 9×13 pan because, trust me, you’ll want plenty to share (or not… I won’t tell!). For each ingredient, I’ve added a little chef’s note to explain why it’s there and how you can make it your own.
For the Pumpkin Cheesecake Layer:
- 1 cup canned pumpkin puree: Not pumpkin pie filling! We want pure pumpkin for that authentic, spiced flavor. It adds moisture and that gorgeous orange hue.
- 2 tsp cinnamon + 1 tsp ground ginger + 1/2 tsp nutmeg: The holy trinity of fall spices. They make the cheesecake layer sing with warm, cozy flavor.
- 1 tsp salt (divided): We’ll split this between layers. Salt is the secret weapon that makes all the other flavors pop and cuts through the sweetness.
- 16 oz mascarpone cheese, softened: This is my secret for an ultra-luxurious, creamy texture. If you can’t find it, you can use all cream cheese, but the mascarpone makes it truly special.
- 16 oz cream cheese, softened: The backbone of any great cheesecake layer. Make sure it’s at room temperature for a silky-smooth, lump-free swirl.
- 1 ½ cups granulated sugar: Sweetens the deal perfectly. The sugar also helps to stabilize the cheesecake as it bakes.
- 4 tbsp all-purpose flour: A little bit of flour helps give the cheesecake layer structure so it holds its own against the dense brownie.
- 2 tbsp vanilla extract: Yes, tablespoons! Vanilla is the flavor bridge that connects the chocolate and pumpkin worlds. Don’t be shy with it.
- 4 large egg yolks: Using just the yolks creates an incredibly rich and tender cheesecake texture without making it too eggy.
For the Brownie Layer:
- 1 cup all-purpose flour: The foundation of our brownie base. For a slightly fudgier texture, you can swap it for a 1:1 gluten-free flour blend.
- 1 cup unsweetened cocoa powder: Use the best quality you can for a deep, intense chocolate flavor. Dutch-processed works great here.
- 1/2 tsp baking powder: Gives the brownies just a tiny bit of lift, making them easier to bite into.
- 1 tsp salt: Balances the intense sweetness and chocolate. I use flaky sea salt for an extra little somethin’-somethin’.
- 1 cup unsalted butter, melted: Provides that classic fudgy, moist brownie texture. Using unsalted lets you control the salt level.
- 1 ½ cups granulated sugar: Sweetens and helps create that beautiful, shiny crackly top we all love on brownies.
- 4 large eggs: Binds everything together and adds richness. Make sure they’re at room temperature for best results.
- 4 tsp vanilla extract: More vanilla! It enhances the chocolate flavor beautifully.
- 1 cup chocolate chips: Because more chocolate is always the answer. I use semi-sweet, but dark or milk would work too.
Optional Twists (My Favorite Part!):
- 1/2 tsp espresso powder: My #1 chef hack! It doesn’t make the brownies taste like coffee; it just deepens and amplifies the chocolate flavor exponentially.
- 1/2 tsp cardamom or allspice: Toss this into the cheesecake layer for an extra layer of warm, complex spice.
- Chopped pecans or walnuts: Sprinkle these on top before baking for a wonderful crunch and nutty flavor.
- A swirl of dulce de leche or caramel: After swirling, drizzle some on top and use a knife to marble it in for a gooey, sweet surprise.
Let’s Get Baking: Step-by-Step Instructions
Ready to create some magic? Follow these steps, and you’ll be a brownie-swirling pro in no time. I’ve packed each step with my favorite kitchen hacks to ensure your success.
Step 1: Prep Like a Pro
First things first, preheat your oven to 350°F (175°C). This is non-negotiable for even baking. Now, line your 9×13 inch pan with parchment paper, leaving some overhang on the sides. This is your ultimate lifesaver hack—it makes removing and slicing the brownies so incredibly easy. No more fighting with the corners of the pan! Give the parchment a light spray with cooking spray for good measure.
Step 2: Create the Pumpkin Cheesecaze Swirl
In a large bowl, beat the softened mascarpone and cream cheese together with an electric mixer until it’s completely smooth and lump-free. This is CRUCIAL. No one wants a chunky swirl. Add in the sugar and pumpkin puree and beat again until it’s well combined and looks like a beautiful orange cream. Now, mix in the flour, all your gorgeous spices (cinnamon, ginger, nutmeg, and maybe that cardamom!), the vanilla, and finally the egg yolks. Mix until it’s all one uniform, creamy dream. Set this bowl aside while you work on the brownies. Chef’s Tip: Licking the beaters after this step is highly encouraged.
Step 3: Whip Up the Fudgy Brownie Base
In another large bowl, whisk together the melted (and slightly cooled) butter, sugar, and eggs. Whisk vigorously for a good minute until the mixture becomes slightly pale and glossy. This helps create that signature crackly brownie top. Beat in the vanilla. Now, sift in the cocoa powder, flour, baking powder, and salt. Yes, sifting! It prevents lumps and ensures a super tender brownie. Gently fold the dry ingredients into the wet until they are *just* combined. Don’t overmix! Finally, fold in those chocolate chips (and the espresso powder if you’re using it).
Step 4: The Grand Swirl Assembly
This is where the art happens. Take about three-quarters of your brownie batter and spread it evenly into the bottom of your prepared pan. It might be a bit thick, so I like to use a slightly wet spatula to press it down smoothly. Next, carefully pour all of that beautiful pumpkin cheesecake mixture over the brownie layer and spread it into an even layer. Now, take the remaining brownie batter and drop it in spoonfuls all over the top of the cheesecake layer. Take a knife or a skewer and gently swirl it through the layers. Don’t go overboard! Just a few figure-eight motions will create those gorgeous marbled patterns.
Step 5: Bake to Perfection
Slide your masterpiece into the preheated oven and bake for 40-45 minutes. You’re looking for the edges to be set and the center to have a very slight jiggle—it will firm up as it cools. A toothpick inserted into the brownie part will come out with some moist crumbs (but not wet batter). Chef’s Warning: The biggest mistake is overbaking! It’s better to err on the side of slightly underdone for the ultimate fudgy texture.
Step 6: The Test of Patience
I know, I know. This is the hardest part. You *must* let the brownies cool completely in the pan on a wire rack. I usually let them cool for a few hours and then pop them in the fridge for at least another hour, or even overnight. This sets the cheesecake layer perfectly and makes for incredibly clean, beautiful slices. Seriously, patience is a virtue that is deliciously rewarded here.
How to Serve These Beauties
Once they’re completely cool, use the parchment paper overhang to lift the entire block of brownies out of the pan and onto a cutting board. Use a large, sharp knife to slice them into bars. For super clean cuts, wipe the knife clean between each slice. These brownies are decadent all on their own, but a little dollop of freshly whipped cream or a scoop of vanilla bean ice cream takes them straight over the top. For a fancy touch, drizzle with a little caramel sauce and sprinkle with extra cinnamon. Serve them with a big mug of coffee or a cold glass of milk and watch everyone’s face light up.
Make It Your Own: Recipe Variations
The fun doesn’t stop here! This recipe is a fantastic canvas for your own creativity. Here are a few of my favorite twists:
- Gluten-Free Joy: Simply swap the all-purpose flour in both layers for your favorite 1:1 gluten-free baking blend. The texture will be just as fabulous.
- Ginger Snap Crunch: Add a textural element by pressing a layer of crushed ginger snap cookies into the bottom of the pan before adding the brownie batter.
- White Chocolate Swirl: Not a milk chocolate fan? Substitute white chocolate chips in the brownie batter for a sweeter, creamier chocolate flavor.
- Bourbon Spice: Add a tablespoon of bourbon to the pumpkin cheesecake mixture for a wonderfully warm, adult-only kick.
- Dairy-Light Version: You can use full-fat Greek yogurt in place of the mascarpone, though the texture will be slightly less rich.
Chef Emily’s Notes
This recipe has been my fall baby for years, and it’s evolved so much. The first time I made it, I was so nervous about the swirl that I barely marbled it at all—it was basically a layered bar. Over time, I got braver with my knife and learned that a confident, quick swirl yields the most beautiful results. I also learned the hard way that using cold cream cheese is a one-way ticket to Lumpy Town. Seriously, let your dairy ingredients sit on the counter for a good hour before you start. I promise it makes all the difference in the world between a good brownie and a mind-blowing, “can I have the recipe?!” brownie. These bars also freeze like a dream. Just wrap them tightly in plastic wrap and they’ll be waiting for you whenever a pumpkin-chocolate emergency strikes.
FAQs & Troubleshooting
Q: My cheesecake layer cracked a little on top. What did I do wrong?
A: Don’t worry, they’ll still taste amazing! Cracking can happen if the oven temperature is too high or if the brownies are slightly overbaked. To prevent it next time, make sure your oven is properly calibrated with an oven thermometer and avoid overmixing the cheesecake batter once the eggs are added, which can incorporate too much air.
Q: Can I make these without eggs?
A: I haven’t tested a full vegan version of this specific recipe, as both layers rely heavily on eggs for structure. For the brownie layer, a flax egg *might* work, but the cheesecake layer would be very difficult to replicate without eggs and dairy. This is one recipe I’d recommend sticking to the original ingredients for the best result.
Q: How should I store these, and how long do they last?
A: Because of the cheesecake layer, these need to be stored in the refrigerator in an airtight container. They will keep beautifully for up to 5 days. The flavors actually get better after a day! You can also freeze them for up to 3 months. Thaw overnight in the fridge.
Q: My swirl disappeared into the batter! How do I get a defined marbled look?
A: This usually means you swirled a bit too vigorously. The key is to be gentle! Just drag your knife or skewer through the top layer in a few simple patterns. You only need to go through about halfway down—don’t drag it all the way to the bottom of the pan. Less is more when it comes to marbling.
Print
Pumpkin Cheesecake Swirl Brownies
- Total Time: 1 hr 5 mins
- Yield: 20 1x
Description
These Pumpkin Cheesecake Brownies take indulgence to the next level—fudgy brownie base meets creamy pumpkin cheesecake swirls. Warm spices, mascarpone, and melty chocolate chips turn this into the ultimate fall dessert. Doubling the recipe? Even better. Let’s add some twists while we’re at it.
Ingredients
Pumpkin Cheesecake Layer:
1 cup canned pumpkin
2 tsp cinnamon
1 tsp ground ginger
1/2 tsp nutmeg
1 tsp salt (divided for both layers)
16 oz mascarpone cheese
16 oz cream cheese
1 ½ cups sugar
4 tbsp all-purpose flour
2 tbsp vanilla extract
4 large egg yolks
Brownie Layer:
1 cup all-purpose flour
1 cup unsweetened cocoa powder
1/2 tsp baking powder
1 tsp salt
1 cup unsalted butter, melted
1 ½ cups sugar
4 large eggs
4 tsp vanilla extract
1 cup chocolate chips
Optional Twists:
1/2 tsp espresso powder (boosts the chocolate flavor)
1/2 tsp cardamom or allspice (extra fall spice)
Chopped pecans or walnuts for crunch
A swirl of dulce de leche or caramel on top
Instructions
Preheat oven to 350°F (175°C) and line a 9×13 pan with parchment.
Make the cheesecake layer: In a bowl, beat mascarpone, cream cheese, sugar, and pumpkin until smooth. Mix in flour, spices, vanilla, and egg yolks. Set aside.
Make the brownie layer: In a separate bowl, mix melted butter, sugar, and eggs until glossy. Stir in vanilla, cocoa powder, flour, baking powder, salt, and espresso powder. Fold in chocolate chips.
Spread 3/4 of brownie batter in pan. Pour pumpkin cheesecake layer on top. Drop remaining brownie batter by spoonfuls and swirl gently with a knife.
Bake for 40–45 minutes, or until center is just set. Cool completely before slicing.
- Prep Time: 20 minutes
- Cook Time: 45 minutes
Nutrition
- Calories: 320 per bar
- Sugar: 26g per bar
- Sodium: 180mg per bar
- Fat: 18g per bar
- Saturated Fat: 11g per bar
- Carbohydrates: 34g per bar
- Protein: 4g per bar
- Cholesterol: 85mg per bar
Nutritional Information (Per Serving, 1 brownie)
Calories: ~320 | Fat: 18g | Saturated Fat: 11g | Carbohydrates: 34g | Sugar: 26g | Protein: 4g | Cholesterol: 85mg | Sodium: 180mg
Please note: This is an estimate provided by an online nutrition calculator. It will vary based on specific ingredients and portion sizes.
Final Thoughts
Pumpkin Cheesecake Swirl Brownies are proof that fall desserts don’t have to make you choose between chocolate and pumpkin—you can have both, swirled together in one glorious, fudgy bite. Every square is a little masterpiece: rich brownie, creamy pumpkin cheesecake, and that marbled top that looks straight out of a bakery case.
What I love most about this recipe is its balance. The chocolate is bold, the pumpkin is spiced and cozy, and together they create a dessert that feels indulgent without being over the top. They’re elegant enough for a holiday table, yet casual enough to sneak with your morning coffee or late-night cocoa. And best of all? They freeze beautifully, so you can always have a stash ready for those “just because” moments.
So, when the leaves start turning and your kitchen calls for something warm, sweet, and shareable, bake up a batch of these beauties. They’ll fill your home with the aroma of cinnamon and chocolate, and your heart with that cozy, fall kind of joy. Trust me—once you make them, they’ll become your new seasonal tradition. 🍂🍫🎃