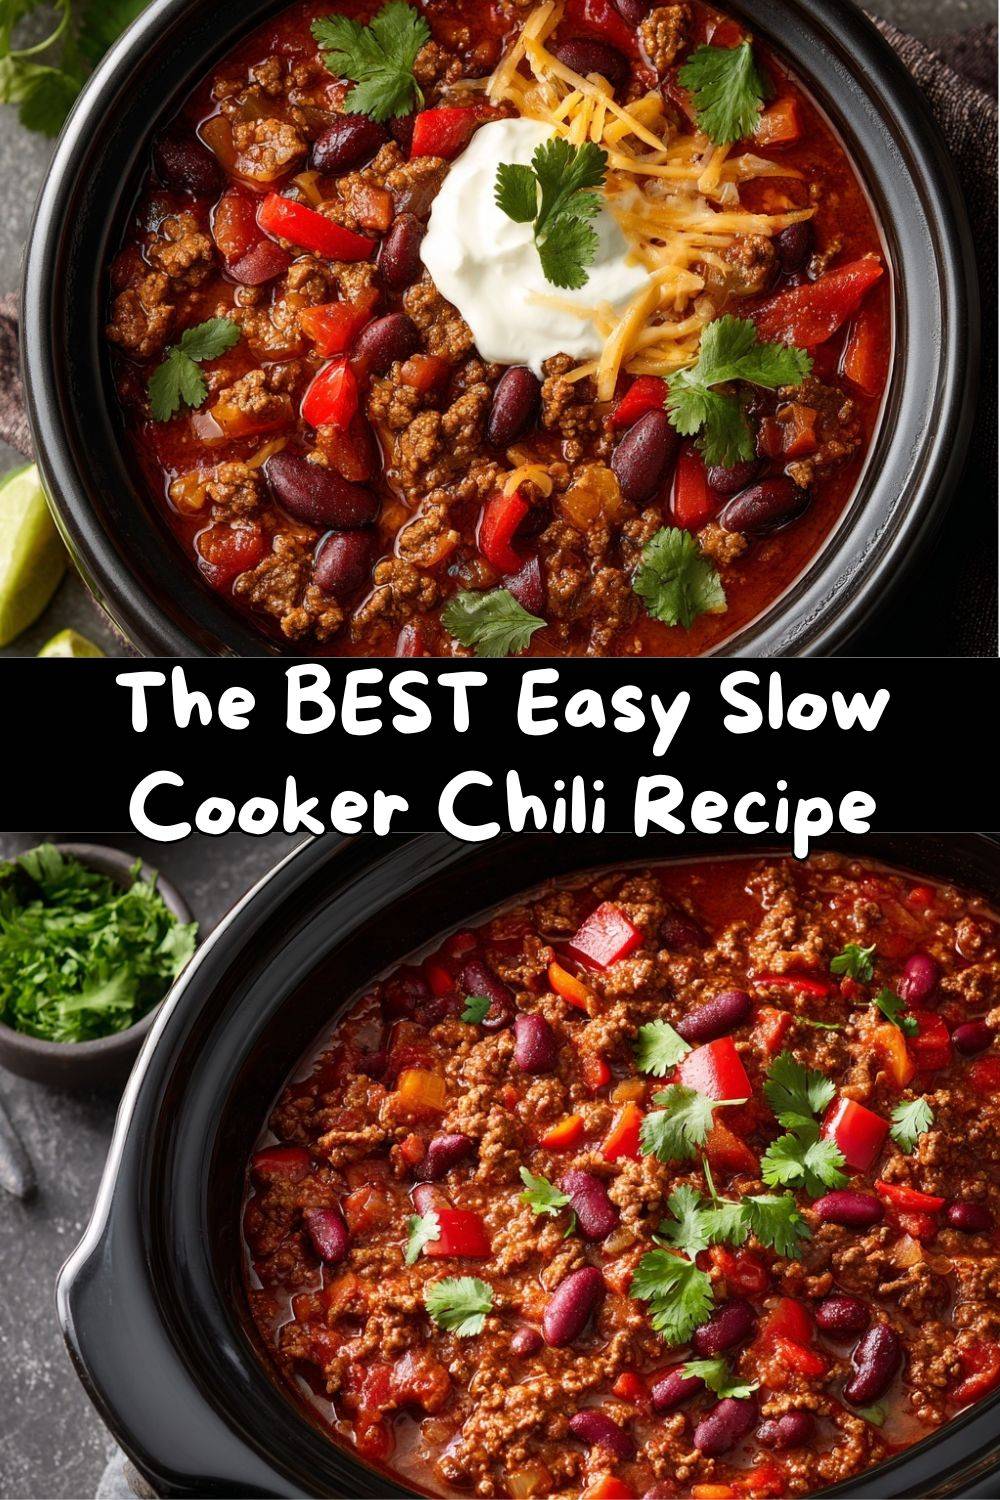
The Cozy, No-Fuss Magic of Slow Cooker Chili: Your New Favorite Comfort Food
Hey friends, Emily here! Can we just take a moment to appreciate the sheer, glorious magic of a slow cooker? It’s like having a tiny, patient kitchen wizard working its cozy spells all day long. And when that wizard is conjuring up a pot of rich, hearty, soul-warming chili? That’s when you know you’ve won the weeknight dinner lottery.
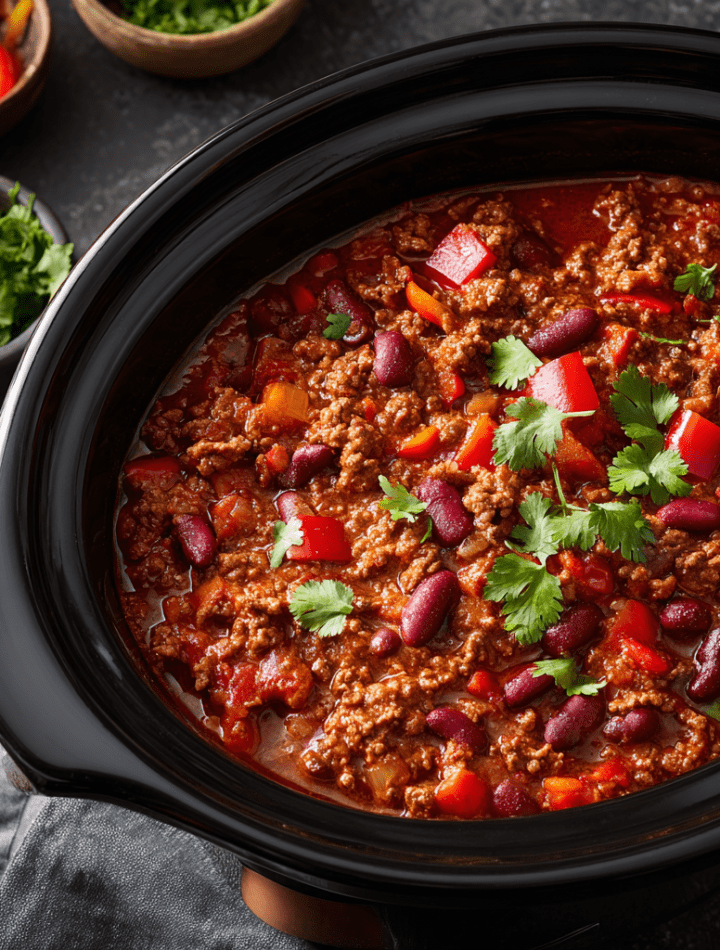
If your life is anything like mine—a beautiful, chaotic blend of recipe testing, chasing flavor, and trying to figure out what to feed my favorite people—then this recipe is about to become your secret weapon. This isn’t just any chili. This is the kind of chili that fills your home with the most incredible aroma, the kind that has everyone wandering into the kitchen asking, “Is it ready yet?” with hopeful puppy-dog eyes. It’s packed with savory ground beef, tender beans, and a bold, perfectly balanced spice blend that simmers low and slow until every spoonful is a flavor explosion.
Whether you’re prepping for a hectic week, feeding a hungry crowd on game day, or just craving a big bowl of edible comfort, this slow cooker chili is your answer. It’s forgiving, it’s flexible, and it’s downright delicious. So, tie on that apron (the messy one is totally acceptable), and let’s make something amazing together. I promise, this recipe is as fun to make as it is to eat!
A Chili Memory: More Than Just Dinner
My love affair with chili started long before culinary school, in my grandma’s kitchen on crisp autumn Saturdays. She wasn’t one for fancy gadgets, but she had this ancient, avocado-green slow cooker that she treated like a treasure. To her, chili wasn’t just a meal; it was an event. It meant my uncles were coming over to watch the game, the house would be noisy and full of laughter, and there would be a giant pot of something incredible simmering for hours.
I remember pulling a chair up to the counter, my chin barely clearing the Formica, to “help” her brown the beef. She’d let me sprinkle in the spices from her little tin containers, telling me, “The secret is in the smell, Emmy. When it smells right, it *is* right.” That aroma—the earthy cumin, the warm chili powder hitting the hot oil—is one of my most powerful scent memories. It’s the smell of anticipation, of family, of being loved and well-fed. This recipe is my homage to her. It’s that same feeling of home, simplified for our busy lives but every bit as heartwarming. Every time I make it, I think of her, and I hope it creates those same cozy memories for you and your crew.
Gathering Your Flavor Arsenal: Ingredients & Why They Matter
Here’s everything you’ll need to build your chili masterpiece. I’ve added my little chef insights and swap ideas because I want you to make this recipe your own!
- 2 lbs ground beef (or turkey/chicken): The hearty foundation! I use an 80/20 blend for the best flavor, but leaner works too. Chef’s Insight: For a deeper flavor, try browning half ground beef and half spicy Italian sausage.
- 1 large onion, chopped: The sweet, aromatic base of so many great dishes. Yellow or white onions are perfect here.
- 1 red bell pepper, diced: Adds a pop of color and a subtle sweetness that balances the spices beautifully.
- 3 cloves garlic, minced: Non-negotiable flavor booster! Fresh is best, but 1 tsp of garlic powder in a pinch will do.
- 2 cans (15 oz) beans, drained and rinsed: I love one can of kidney beans for tradition and one can of black beans for variety. Pinto beans are also fantastic! Pro Tip: Rinsing removes excess sodium and that starchy can liquid.
- 2 cans (14.5 oz) diced tomatoes: They add texture and tangy brightness. Fire-roasted diced tomatoes are my secret weapon for an extra layer of smoky flavor.
- 1 can (6 oz) tomato paste: This is your flavor concentrator and thickener! It gives the chili a rich, deep tomato base.
- 2½ tbsp chili powder: The namesake star! This blend usually contains ground chilies, cumin, garlic, and oregano. Adjust to your heat preference.
- 1 tsp ground cumin: The earthy, warm soul of chili. If your spices are older than 6 months, consider replacing them for maximum punch.
- 1 tsp smoked paprika: My favorite trick! It adds a subtle smokiness that makes the chili taste like it simmered over a campfire.
- 1 tsp dried oregano: A classic herb that adds a touch of complexity.
- Salt and black pepper to taste: Season in layers! A little when browning the beef, and always a final adjustment at the end.
- ½ to 1 cup beef broth or water: This controls your consistency. Start with ½ cup for a thicker chili; you can always add more later.
Let’s Get Cooking: Your Foolproof, Flavor-Packed Steps
Okay, team! Let’s walk through this together. These steps are simple, but each one builds a layer of flavor that makes all the difference.
- The Sizzling Start: In a large skillet over medium heat, brown your ground beef. Don’t just gray it—get some good caramelization on those crumbles! This is called the Maillard reaction, and it’s fancy chef talk for “big flavor.” Once cooked, drain off the excess fat. Chef’s Hack: While the beef drains, use a bit of that leftover fat in the pan to cook your veggies—waste not, want not!
- Veggie Time: In the same skillet (see?), add your chopped onion, diced bell pepper, and minced garlic. Sauté for about 5 minutes, just until the onions turn translucent and the whole kitchen smells incredible. This step wakes up the vegetables and softens their raw edge, making for a sweeter, more harmonious chili.
- The Great Transfer: Now, scrape everything from the skillet into your slow cooker insert. This includes every last bit of those flavorful browned bits!
- Dump & Stir (The Fun Part!): To the slow cooker, add your drained beans, diced tomatoes (with their juices!), tomato paste, all the spices (chili powder, cumin, smoked paprika, oregano), and your broth. Grab a sturdy spoon and give it one big, confident stir until the tomato paste is fully incorporated and everything is beautifully combined.
- Let the Magic Happen: Pop the lid on. Set your slow cooker to LOW for 6-8 hours or HIGH for 3-4 hours. My Strong Recommendation: Low and slow is the way to go! It allows the flavors to marry and deepen into something truly special.
- The Grand Finale – Taste & Adjust: This is the most important step! Before serving, give your chili a taste. Does it need more salt? A pinch more smoked paprika? This is your creation—season it until it sings to you!
Bowl of Joy: How to Serve Your Masterpiece
Half the fun of chili is the toppings bar! It turns a simple meal into an interactive, customizable feast. Ladle that steaming, fragrant chili into big, cozy bowls. Then, set out a spread of toppings and let everyone build their perfect bite. Here’s what I love to offer:
- The Classics: A big bowl of shredded sharp cheddar cheese, a dollop of cool sour cream or Greek yogurt, and a handful of fresh, chopped cilantro or green onions.
- The Crunch: Crumbled tortilla chips or Fritos add a fantastic salty crunch. Cornbread on the side is a non-negotiable for me!
- The Heat: Sliced fresh jalapeños, a drizzle of hot sauce, or pickled banana peppers for my spice-loving friends.
- The Extra Twists: A squeeze of fresh lime juice brightens everything up, and diced avocado adds a lovely creamy texture.
Make It Your Own: Delicious Recipe Twists
One recipe, endless possibilities! Here are a few of my favorite ways to mix things up:
- “No Bean” Texas-Style: Skip the beans entirely! Use 3 lbs of chuck roast, cut into small chunks, in place of ground beef. Add an extra cup of beef broth and let it cook until the beef is fall-apart tender.
- Turkey & Sweet Potato: A lighter, sweeter twist. Swap the ground beef for ground turkey. Add one large sweet potato, peeled and diced, with the other vegetables. The sweet potato melts into the chili, making it subtly sweet and incredibly satisfying.
- Three-Bean Vegetarian: Omit the beef and use a third can of beans (like pinto or chickpeas). Use vegetable broth. Add 1 cup of frozen corn and ½ cup of quinoa (rinse it first!) for extra heartiness. You won’t miss the meat!
- White Chicken Chili: A totally different, creamy direction! Use 2 lbs of boneless chicken breast or thighs. Replace diced tomatoes with 2 cans of green chiles and 1 can of white beans (like Great Northern or Cannellini). Use chicken broth and add 1 tsp of ground coriander. Stir in 1 cup of shredded Monterey Jack cheese at the end until melted.
From My Kitchen to Yours: Chef Emily’s Notes
This recipe has been my trusty sidekick for years, and it’s evolved just like we all do. The smoked paprika was a happy accident one day when I was out of regular paprika—best mistake ever! I’ve also learned that this chili tastes even better the next day (if you can believe it), as the flavors continue to party together in the fridge. It freezes like a dream, too. I often double the batch and freeze portions in airtight containers for those “I don’t want to cook” nights. They’re like edible gifts from Past You to Present You. You’re welcome. And don’t worry about being too precise. Chili is forgiving. More beans? Great! Extra pepper? Wonderful! This is your cozy, delicious canvas.
Your Questions, Answered: Chili FAQs
Over the years, you’ve asked some great questions. Here are the answers!
- My chili is too thin/too thick. Help! No problem! For thin chili, remove the lid for the last 30-60 minutes of cooking to allow liquid to evaporate. You can also make a “slurry” by mixing 1 tbsp cornstarch with 2 tbsp cold water and stirring it into the hot chili—it will thicken up in minutes. For chili that’s too thick, simply stir in more broth or water, ¼ cup at a time, until you reach your perfect consistency.
- Can I just dump everything in raw? Technically, yes—the slow cooker will cook it safely. But for the *best* flavor, I 100% recommend taking the 10 extra minutes to brown the meat and sauté the veggies. It builds a foundational flavor that you just can’t get from the “dump” method.
- How can I make it spicier? I’ve got you! Add ½ tsp of cayenne pepper or crushed red pepper flakes with the other spices. You can also stir in a diced jalapeño (seeds and ribs removed for medium heat, left in for high heat) with the bell pepper.
- What’s the best way to store and reheat leftovers? Let the chili cool completely, then store it in an airtight container in the fridge for up to 5 days. Reheat gently on the stovetop over medium-low heat or in the microwave, stirring occasionally. It also freezes beautifully for up to 3 months.
Nutritional Information (A Per-Serving Guide)
Here’s a general nutritional breakdown for a 1-cup serving, made with 90% lean ground beef and kidney beans. Remember, this can vary based on your specific ingredients and toppings!
- Calories: ~280
- Total Fat: 12g
- Saturated Fat: 4.5g
- Cholesterol: 60mg
- Sodium: ~650mg (To lower sodium, use no-salt-added tomatoes/beans and low-sodium broth.)
- Carbohydrates: 20g
- Fiber: 6g (That’s a great boost for your day!)
- Sugars: 5g (Naturally occurring from tomatoes and onions)
- Protein: 22g (A protein powerhouse that keeps you full!)
Final Thoughts: Your Cozy Kitchen Victory
And there you have it, my friend! Your guide to the coziest, most flavorful, hassle-free slow cooker chili. This recipe is more than just a list of ingredients and steps—it’s an invitation to slow down, to fill your home with incredible smells, and to nourish yourself and the people you love with something made with intention (and a whole lot of flavor).
I hope this chili becomes a regular in your rotation, the thing you make when you need a surefire win. I hope it fuels game day victories, lazy Sundays, and busy Wednesday nights with equal grace. Most of all, I hope you have as much fun making it as I do. Now, go grab that slow cooker and get started. Your future self, coming home to a ready-made feast, will thank you. Don’t forget to tag me if you share your creation—I love seeing your kitchen wins!
With love and a full spoon,
Emily 🥣❤️