Watermelon Mochi: A Sweet Summer Delight
Hey there, fellow food lovers! 👋 Today, I’m so excited to dive into a recipe that’s not only a treat for your taste buds but also a feast for your eyes. Say hello to Watermelon Mochi! This delightful fusion of textures combines the chewy, delightful properties of mochi with the refreshing taste of watermelon. Trust me; each bite is like a mini summer vacation.
Mochi, a traditional Japanese rice cake, embodies the spirit of comfort food. It’s gluten-free, made from sweet rice, and offers a unique chewiness that is simply irresistible. And when you infuse it with the juicy essence of watermelon, well, you have a showstopper on your hands. Perfect for summer parties, picnics in the park, or even just to enjoy on a warm weekend afternoon, watermelon mochi is bound to become your go-to recipe.
But let me tell you, creating mochi at home may sound a little daunting, but don’t worry! I’ll guide you through every step in a fun, easygoing way. We’ll explore how to handle sweet rice flour, pick the best watermelon, and add that extra touch of magic that makes this treat unforgettable. So, grab your apron, and let’s get ready to groove in the kitchen together!
Personal Story
Growing up, summer afternoons were filled with vivid colors, laughter, and most importantly, food. One of my fondest memories revolves around sweet juicy watermelon slices shared with my family during BBQs in the backyard. Those days were all about sunshine and the simple pleasure of indulging in our favorite summer fruit.
Fast forward to my culinary adventures, I discovered mochi during a health and wellness retreat. The idea of incorporating my beloved summer fruit into this chewy delight sparked joy in my heart. I remember the first time I combined these two culinary loves. With a few trials, I created the Watermelon Mochi recipe that you’re about to embark on today. It encapsulates those cherished childhood memories while adding a modern twist. Now every bite of watermelon mochi takes me back to those carefree days of summer!
Ingredients
Alright, let’s gather our ingredients. Here’s what you’ll need to whip up this delicious watermelon mochi:
- Sweet Rice Flour (Mochiko): This is the star of our show. Sweet rice flour gives mochi its signature chewy texture. If you can’t find sweet rice flour, you can substitute with glutinous rice flour, but it may alter the texture slightly.
- Watermelon: Use a fresh, ripe watermelon for maximum sweetness! Look for one with a uniform shape and a creamy yellow spot on the bottom; this indicates ripeness. If watermelon isn’t in season, feel free to swap with other juicy fruits like strawberries or mangoes.
- Sugar: We’ll be adding sugar to enhance the sweetness of the mochi batter. Brown sugar works well if you’re going for a deeper flavor, but granulated sugar will do the trick too.
- Cornstarch: This is your anti-stick insurance policy. It’s crucial for dusting your work surface and prevents the mochi from sticking together.
- Water: Simple, yet essential. Water brings our mixture together, giving us that perfect mochi consistency.
- Optional: Food Coloring or Flavoring: To add a fun twist, consider a drop of natural food coloring or fruit essence. I love a hint of mint or lime zest for that extra zing!
Step-by-Step Instructions
Step 1: Prepare your watermelon
Begin by slicing your watermelon. Cut it into chunks to make it easier to juice. You’ll need around 1 cup of watermelon juice for our mochi. If you want your mochi to have little bursts of fruit, you can set aside some watermelon pieces after juicing.
Tip: If you have a blender, toss the chunks in there and blend until smooth, then strain to remove any pulp.
Step 2: Make the mochi batter
In a large bowl, whisk together 1 cup of sweet rice flour, ¼ cup of sugar, and a pinch of salt. Once combined, make a well in the center and pour in the 1 cup of watermelon juice. Mix until you have a smooth, lump-free batter. It should be similar to pancake batter, thick but pourable.
Chef Insight: If you like your mochi a bit sweeter, feel free to add a little more sugar to taste. Just remember, the watermelon’s natural sweetness will come through too!
Step 3: Steam the mochi
Next, you will need a steamer. If you don’t have a traditional bamboo steamer, you can use a heatproof bowl placed over a pot of boiling water. Line the bottom of your steamer with parchment paper, and pour in the mochi batter. Cover with a lid and steam for about 20-25 minutes, or until the mochi turns translucent and has a slight bounce.
Pro Tip: Keep an eye on your steaming water level; you don’t want it to run dry!
Step 4: Cool and knead the mochi
Once your mochi is steamed, transfer it to a greased surface dusted with cornstarch. Let it cool for a bit, but while still warm, grease your hands and knead the mochi gently for a minute or two. Sprinkle with more cornstarch as needed.
Tip: Wet hands can also help prevent sticking and make kneading easier.
Step 5: Form the mochi
Now, divide the mochi into equal-sized pieces (about the size of a golf ball). Flatten each piece into a disc and place a small piece of watermelon or a teaspoon of watermelon puree in the center. Pinch the edges together to seal, rolling it gently into a ball shape to make it cute.
Fun Fact: Each piece can be a surprise, with some containing luscious fruit and others pure mochi—perfect for sharing!
Step 6: Dust and chill
Dust your finished watermelon mochi bites in cornstarch and place them in a single layer on a plate. Pop them in the fridge for about 30 minutes to firm up before enjoying!
Chef Hack: Feel free to experiment with different filling options, like sweetened red bean paste or matcha, for a flavor twist!
Serving Suggestions
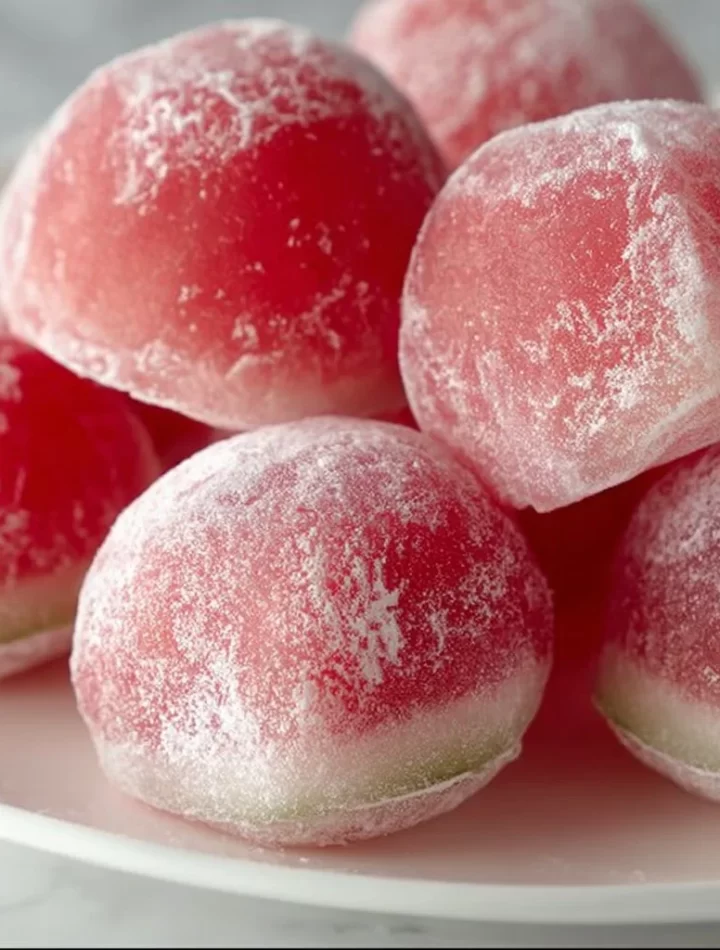
Pulling those beautifully pink mochi bites out of the fridge is like revealing a treasure. To serve, arrange them on a pretty platter and sprinkle lightly with extra cornstarch to keep them from sticking together. Garnish with fresh mint leaves or edible flowers for that Instagram-ready touch.
These mochi bites are great for summer parties, picnics, or even as a unique dessert at dinner gatherings. Pair them with a light dessert wine or a refreshing iced tea for a complete experience.
Recipe Variations
Now, if you want your watermelon mochi experience to be even more exciting, here are some fun variations to try:
- Berry Burst: Instead of watermelon, use blended strawberries or blueberries. You’ll get a fantastic pop of color and an incredible burst of flavor.
- Coconut Cream: Add coconut milk to your mochi batter for a tropical twist. You can even fill the mochi with a dollop of sweetened coconut cream for a rich treat.
- Matcha Madness: Sift in some matcha powder into your mochi flour. The earthy flavor pairs surprisingly well with the sweet watermelon!
- Chocolate Delight: Sprinkle cocoa powder into the batter or make a chocolate version by substituting half of the sweet rice flour with cocoa powder.
- Spicy Kick: Add a pinch of cayenne pepper or sumac to the batter for a hint of heat paired with watermelon sweetness. It’s an unexpected but delicious twist that friends will talk about for ages!
Chef’s Notes
In the time I’ve been creating this recipe, I’ve had many joyful moments in the kitchen. One particularly funny memory involves my dog, Max, who made his way into the kitchen just as I was preparing the mochi. Let’s just say that the sticky dough was a lot harder to clean off his paws than I anticipated!
Mochi has always been a dish I love sharing with my friends. Watch their faces light up when they realize they can create their adaptations right in their homes! This recipe has evolved over time, and now, every time I share it, I see those cherished smiles all over again.
FAQs and Troubleshooting
1. Why is my mochi too sticky?
If your mochi is sticky, you may not have added enough cornstarch either during kneading or on the surface. Take your time dusting everything lightly with cornstarch, especially if you live in a humid environment!
2. Can I freeze watermelon mochi?
Yes, you can! Freeze your mochi in an airtight container, and when you’re ready to enjoy, let them thaw in the fridge for a few hours before serving.
3. My mochi came out too hard. What happened?
Over-steaming can cause mochi to become rubbery. Keep an eye on your timing and check for doneness a few minutes early!
4. Can I use regular rice flour instead of sweet rice flour?
Regular rice flour will not work as well, as it lacks the sticky properties of sweet rice flour. Stick with Mochiko (sweet rice flour) for the best results!
Nutritional Info
As with any delicious treat, moderation is key! Watermelon mochi generally contains approximately:
- Calories: 80 per piece
- Carbohydrates: 18g
- Protein: 1g
- Fat: 0g
- Sugars: 7g
- Fiber: 0.5g
This is a rough estimate, and the nutritional content may vary depending on your specific ingredient choices, especially if you choose to fill these mochi with additional ingredients!
Final Thoughts
There you have it, my foodie friends—a delightful dive into the world of Watermelon Mochi! I hope you find joy not just in making these treats but also in sharing them with the people you love. With every chewy bite, you’ll be whisked back to those sunny, carefree days.
So, put on that apron and get ready to turn your kitchen into a joyful, flavor-filled haven. I can’t wait to hear how yours turn out! Don’t forget to snap a pic and tag me on social media because I absolutely love to see your creations. Until next time, stay hungry, stay happy, and let’s keep making delicious memories together!
Happy cooking! 🍉❤️
Print
Watermelon Mochi
- Total Time: 40 minutes
- Yield: 12 pieces 1x
- Diet: Gluten-Free
Description
A delightful fusion of chewy mochi and refreshing watermelon, perfect for summer parties and warm afternoons.
Ingredients
- 1 cup Sweet Rice Flour (Mochiko)
- ¼ cup Sugar (Brown or Granulated)
- 1 cup Watermelon Juice
- 1 Watermelon (for juicing)
- Cornstarch (for dusting)
- Water (as needed)
- Optional: Food Coloring or Flavoring
Instructions
- Prepare your watermelon by slicing it into chunks to extract 1 cup of juice.
- Make the mochi batter by whisking together sweet rice flour, sugar, and salt, then adding watermelon juice.
- Steam the mochi batter in a prepped steamer for 20-25 minutes until translucent.
- Cool the steamed mochi on a cornstarch-dusted surface and knead gently.
- Form the mochi by dividing it, placing watermelon pieces inside, and rolling them into balls.
- Dust the mochi with cornstarch and chill in the fridge for 30 minutes before serving.
Notes
Experiment with different fillings like sweetened red bean paste or matcha for a flavor twist.
- Prep Time: 15 minutes
- Cook Time: 25 minutes
- Category: Dessert
- Method: Steaming
- Cuisine: Japanese
Nutrition
- Serving Size: 1 piece
- Calories: 80
- Sugar: 7g
- Sodium: 0mg
- Fat: 0g
- Saturated Fat: 0g
- Unsaturated Fat: 0g
- Trans Fat: 0g
- Carbohydrates: 18g
- Fiber: 0.5g
- Protein: 1g
- Cholesterol: 0mg
Keywords: watermelon, mochi, dessert, summer, gluten-free