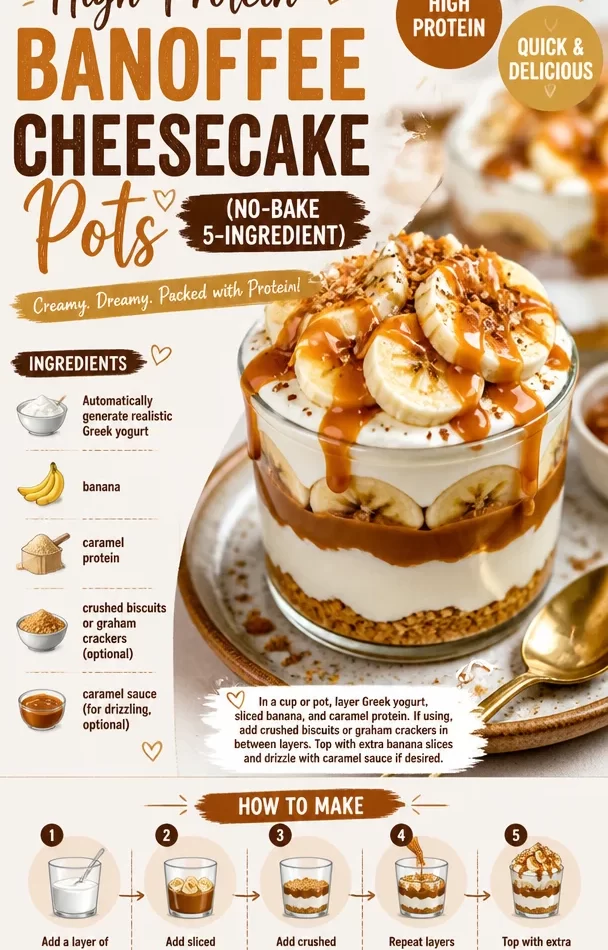
Protein Banoffee Cheesecake Pots: A Sweet Twist on a Classic
Hey there, fellow food lover! Are you ready to take your dessert game to a whole new level? Today, I’m super excited to share with you my delightful Protein Banoffee Cheesecake Pots! This delectable treat is not only creamy and dreamy but also packed with the goodness of protein. Perfect for those who want a little indulgence without sacrificing their health goals. Trust me; this is one dessert you’ll want to keep on repeat!
A Sweet Memory in Every Bite
Let me take you down memory lane for a moment. Picture this: a summer afternoon in grandma’s cozy kitchen, the sun streaming through the window, casting warm, golden rays over the countertops. The tantalizing aroma of bananas and caramel wafted through the air as my grandma whipped up her famous banoffee pie. I used to hover around, my little fingers ready to sneak a taste of that silky filling.
Years later, I found myself replicating that cherished dessert in my own kitchen, searching for a way to bring my childhood memories into a healthier realm. After much tweaking, I came up with these Protein Banoffee Cheesecake Pots—an idea born from nostalgia and a love for creative cooking. They retain that charming banoffee flair while being lighter and packed with protein. You won’t just be serving dessert; you’ll be serving up love and fond memories.
Ingredients
Let’s get into the nitty-gritty of what you’ll need for these delightful pots:
- Graham Cracker Crumbs: You could also use digestive biscuits. They add a crunchy base that balances the creamy layers.
- Unsweetened Cocoa Powder: Not just for flavor, it’s rich in antioxidants! If you want to keep it sweeter or if you’re not a cocoa fan, try substitute with raw cacao powder for a more intense flavor.
- Greek Yogurt: This is the star of our cheesecake layer! It adds creaminess and a protein boost. For a non-dairy option, go for coconut yogurt.
- Cream Cheese: Gives that luxurious cheesecake texture. Low-fat cream cheese works too, or a plant-based cream cheese if you’re dairy-free.
- Whey or Plant-Based Protein Powder: Feel free to pick your favorite flavor; vanilla or chocolate work great here.
- Banana: The fruit that ties the banoffee together! As an alternative, you could use applesauce for a different flavor profile.
- Maple Syrup or Honey: This adds sweetness to the mixture. If you’re looking to cut back on sugars, try stevia or erythritol.
- Salt: Just a pinch can elevate all the flavors! Don’t skip it!
- Whipped Cream for Topping: This is where you get to be a bit fancy! Use sweetened whipped cream, or for a healthier twist, use whipped coconut cream.
Step-by-Step Instructions
1. Prepare the Crust
Start by crushing the graham crackers (or digestive biscuits) into fine crumbs. You can use a food processor or simply place them in a zip-top bag and smash them with a rolling pin. Mix the crumbs with cocoa powder for a chocolatey kick. Add melted butter (or coconut oil if you’re going dairy-free) and stir until you get a sandy texture.
Chef Tip: For an even crunchier base, toast the crust in the oven at 350°F (175°C) for about 8–10 minutes. Just keep an eye on it; we don’t want any burnt edges!
2. Make the Filling
In a mixing bowl, combine the Greek yogurt, cream cheese, vanilla protein powder, and maple syrup. Whisk on medium speed until the mixture is silky smooth with no lumps.
Chef Hack: If your cream cheese is too cold, you might get lumps—so be sure to let it sit at room temperature for about 30 minutes before mixing.
3. Add Bananas
Slice your ripe banana and fold half of them into the filling. Leave the other half aside for later. The bananas will add natural sweetness and that classic banoffee flavor!
4. Assemble the Pots
Grab your serving cups or bowls. Start by layering a spoonful of the graham cracker crust at the bottom, followed by the creamy cheesecake filling. Repeat until you fill the pots, leaving space near the top for whipped cream and the reserved banana slices.
Chef’s Note: Using clear cups lets you show off those gorgeous layers—perfect for impressing guests at a dinner party!
5. Chill and Serve
Refrigerate the pots for at least 2 hours (or overnight for best results). This allows the flavors to meld and the cheesecake layer to firm up. Right before serving, add a dollop of whipped cream and garnish with extra banana slices and a sprinkle of cocoa powder or crushed graham crackers.
Serving Suggestions
When it comes to serving, leave them in the cute little pots or cups for a casual vibe, or transfer them onto a dessert platter for more elegance. You could also pair these pots with a side of coffee or a scoop of your favorite ice cream for those extra special occasions.
And if you’re feeling fancy, toss some dark chocolate shavings or a drizzle of caramel sauce on top for a showstopper appearance that screams "indulgence."
Recipe Variations
If you want to mix things up a little, check out these variations:
- Add Peanut Butter: Mix in a tablespoon of peanut butter into the cheesecake layer for a nutty flavor that complements the banana beautifully.
- Chocolate Haze: Swirl some chocolate hazelnut spread into the filling for a luxurious twist.
- Sugar-Free Delight: Use sugar-free maple syrup or fruit puree for a lighter dessert that still satisfies your sweet tooth!
- Berry Bonanza: Replace banana with strawberries or blueberries for a fruity fresh take on these cheesecake pots.
- Nutty Crunch: Mix in or sprinkle some chopped nuts (like walnuts or almonds) into the crust for added texture and flavor.
Chef’s Notes
These Protein Banoffee Cheesecake Pots have come a long way from their humble beginnings in my grandma’s kitchen. I remember the first time I attempted to make a healthier version—let’s just say there were some very interesting textures (and flavors) involved! But that’s the beauty of experimenting in the kitchen: sometimes you have to go through a few bumps and giggles to discover that perfect recipe.
FAQs and Troubleshooting
Q: Why is my filling lumpy?
A: This often happens if the cream cheese is too cold. Make sure to let it come to room temperature before mixing.
Q: Can I make these in advance?
A: Absolutely! These pots can be prepared one or two days ahead. Just make sure to keep them covered in the refrigerator.
Q: How can I make these gluten-free?
A: Use gluten-free cookies or snacks for the crust—there are plenty of tasty options available!
Q: Can I substitute Greek yogurt?
A: Yes! Silken tofu or almond cream can be good alternatives if you’re looking for a non-dairy option.
Nutritional Info
These protein-packed pots not only satisfy your sweet cravings but also contribute positively to your nutritional needs. Each serving is approximately 250 calories, with 14 grams of protein and healthier fats, along with essential vitamins and minerals from the fruit. Swapping out ingredients can further tailor them to your dietary preferences, making this a versatile recipe for everyone.
Final Thoughts
So there you have it, lovely foodies! These Protein Banoffee Cheesecake Pots are not just a dessert; they’re a nostalgic trip down memory lane wrapped in a delicious, creamy package. Bring a little comfort food joy into your life while keeping an eye on health—what’s not to love?
Trust me; once you try this recipe, it’ll become a staple for both your weeknight dinners and special occasions. So, what are you waiting for? Grab those ingredients and let’s make some sweet magic happen in the kitchen. Happy cooking, and, as always, let’s chow down together!
Print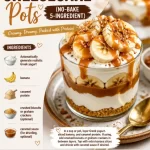
Protein Banoffee Cheesecake Pots
- Total Time: 130 minutes
- Yield: 4 servings 1x
- Diet: High Protein, Vegetarian
Description
Delightful Protein Banoffee Cheesecake Pots that are creamy, dreamy, and packed with protein for a healthier indulgence.
Ingredients
- 1 cup Graham Cracker Crumbs
- 2 tbsp Unsweetened Cocoa Powder
- 1 cup Greek Yogurt
- 8 oz Cream Cheese
- 1 scoop Whey or Plant-Based Protein Powder
- 1 Banana, sliced
- 2 tbsp Maple Syrup or Honey
- Pinch of Salt
- Whipped Cream for Topping
Instructions
- Prepare the crust by crushing the graham crackers into fine crumbs and mixing them with cocoa powder and melted butter.
- Make the filling by combining Greek yogurt, cream cheese, protein powder, and maple syrup; whisk until smooth.
- Add half the sliced bananas to the filling and fold them in.
- Assemble the pots by layering the crust and filling in serving cups, leaving space for whipped cream.
- Chill in the refrigerator for at least 120 minutes before serving, then top with whipped cream and remaining banana slices.
Notes
For a crunchy base, consider toasting the crust. Use clear cups for a pretty presentation and consider variations like adding peanut butter or chocolate hazelnut spread.
- Prep Time: 15 minutes
- Cook Time: 10 minutes
- Category: Dessert
- Method: No-Bake
- Cuisine: American
Nutrition
- Serving Size: 1 serving
- Calories: 250
- Sugar: 10g
- Sodium: 200mg
- Fat: 9g
- Saturated Fat: 4g
- Unsaturated Fat: 4g
- Trans Fat: 0g
- Carbohydrates: 30g
- Fiber: 2g
- Protein: 14g
- Cholesterol: 30mg
Keywords: protein, cheesecake, dessert, banoffee, healthy, no-bake, quick, easy